
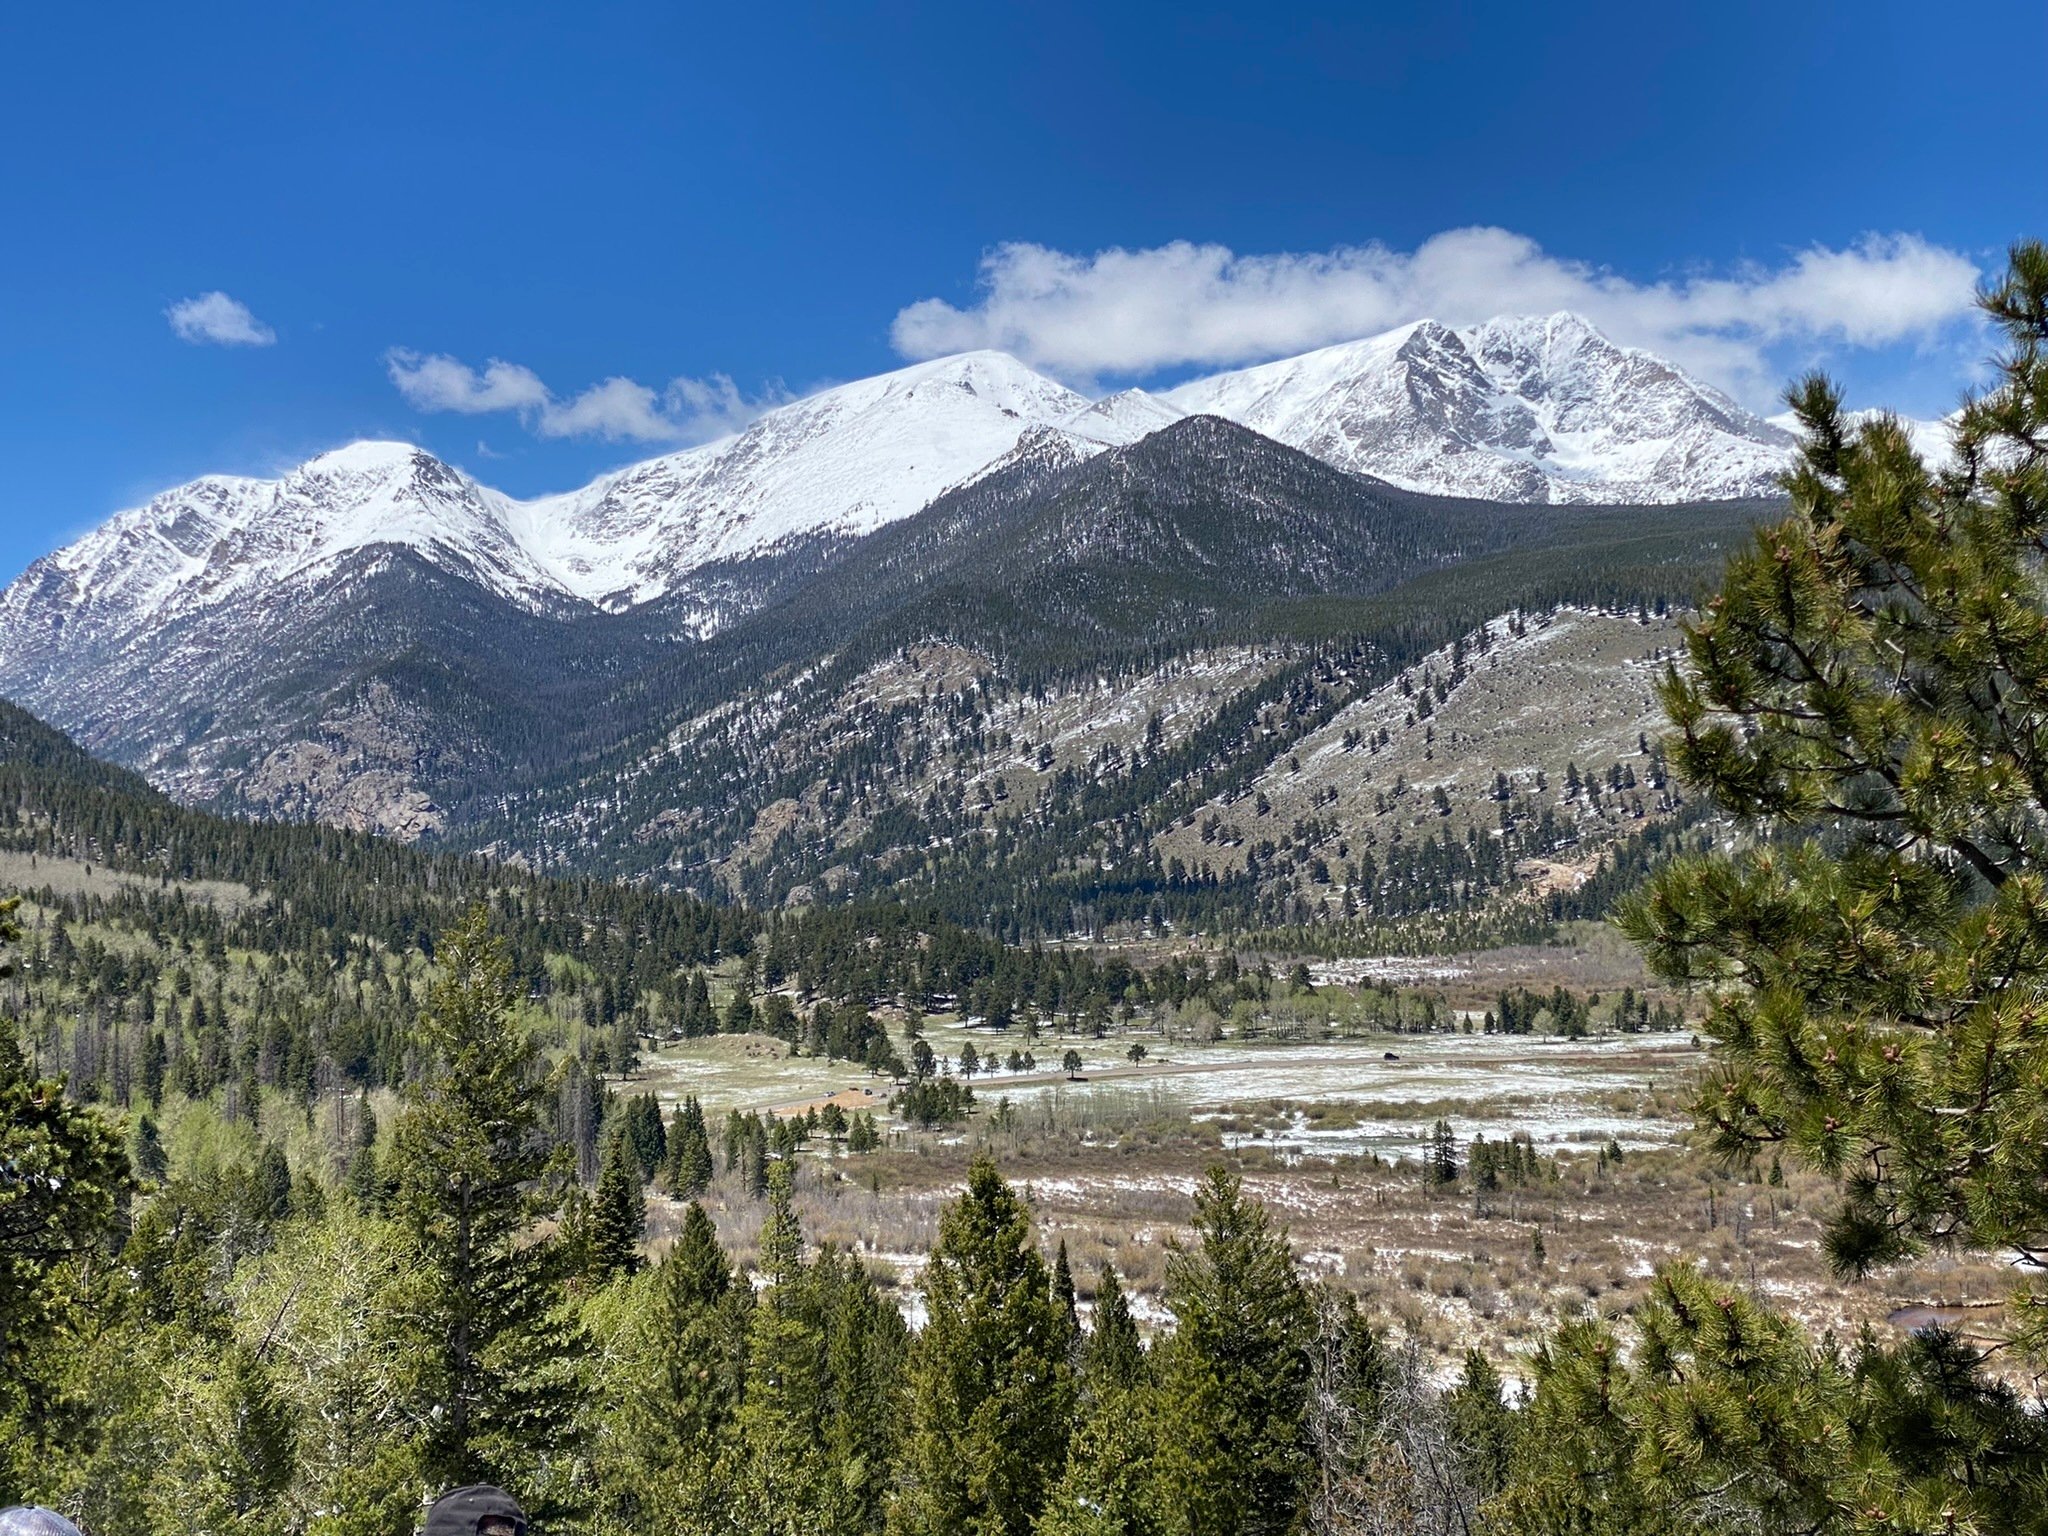
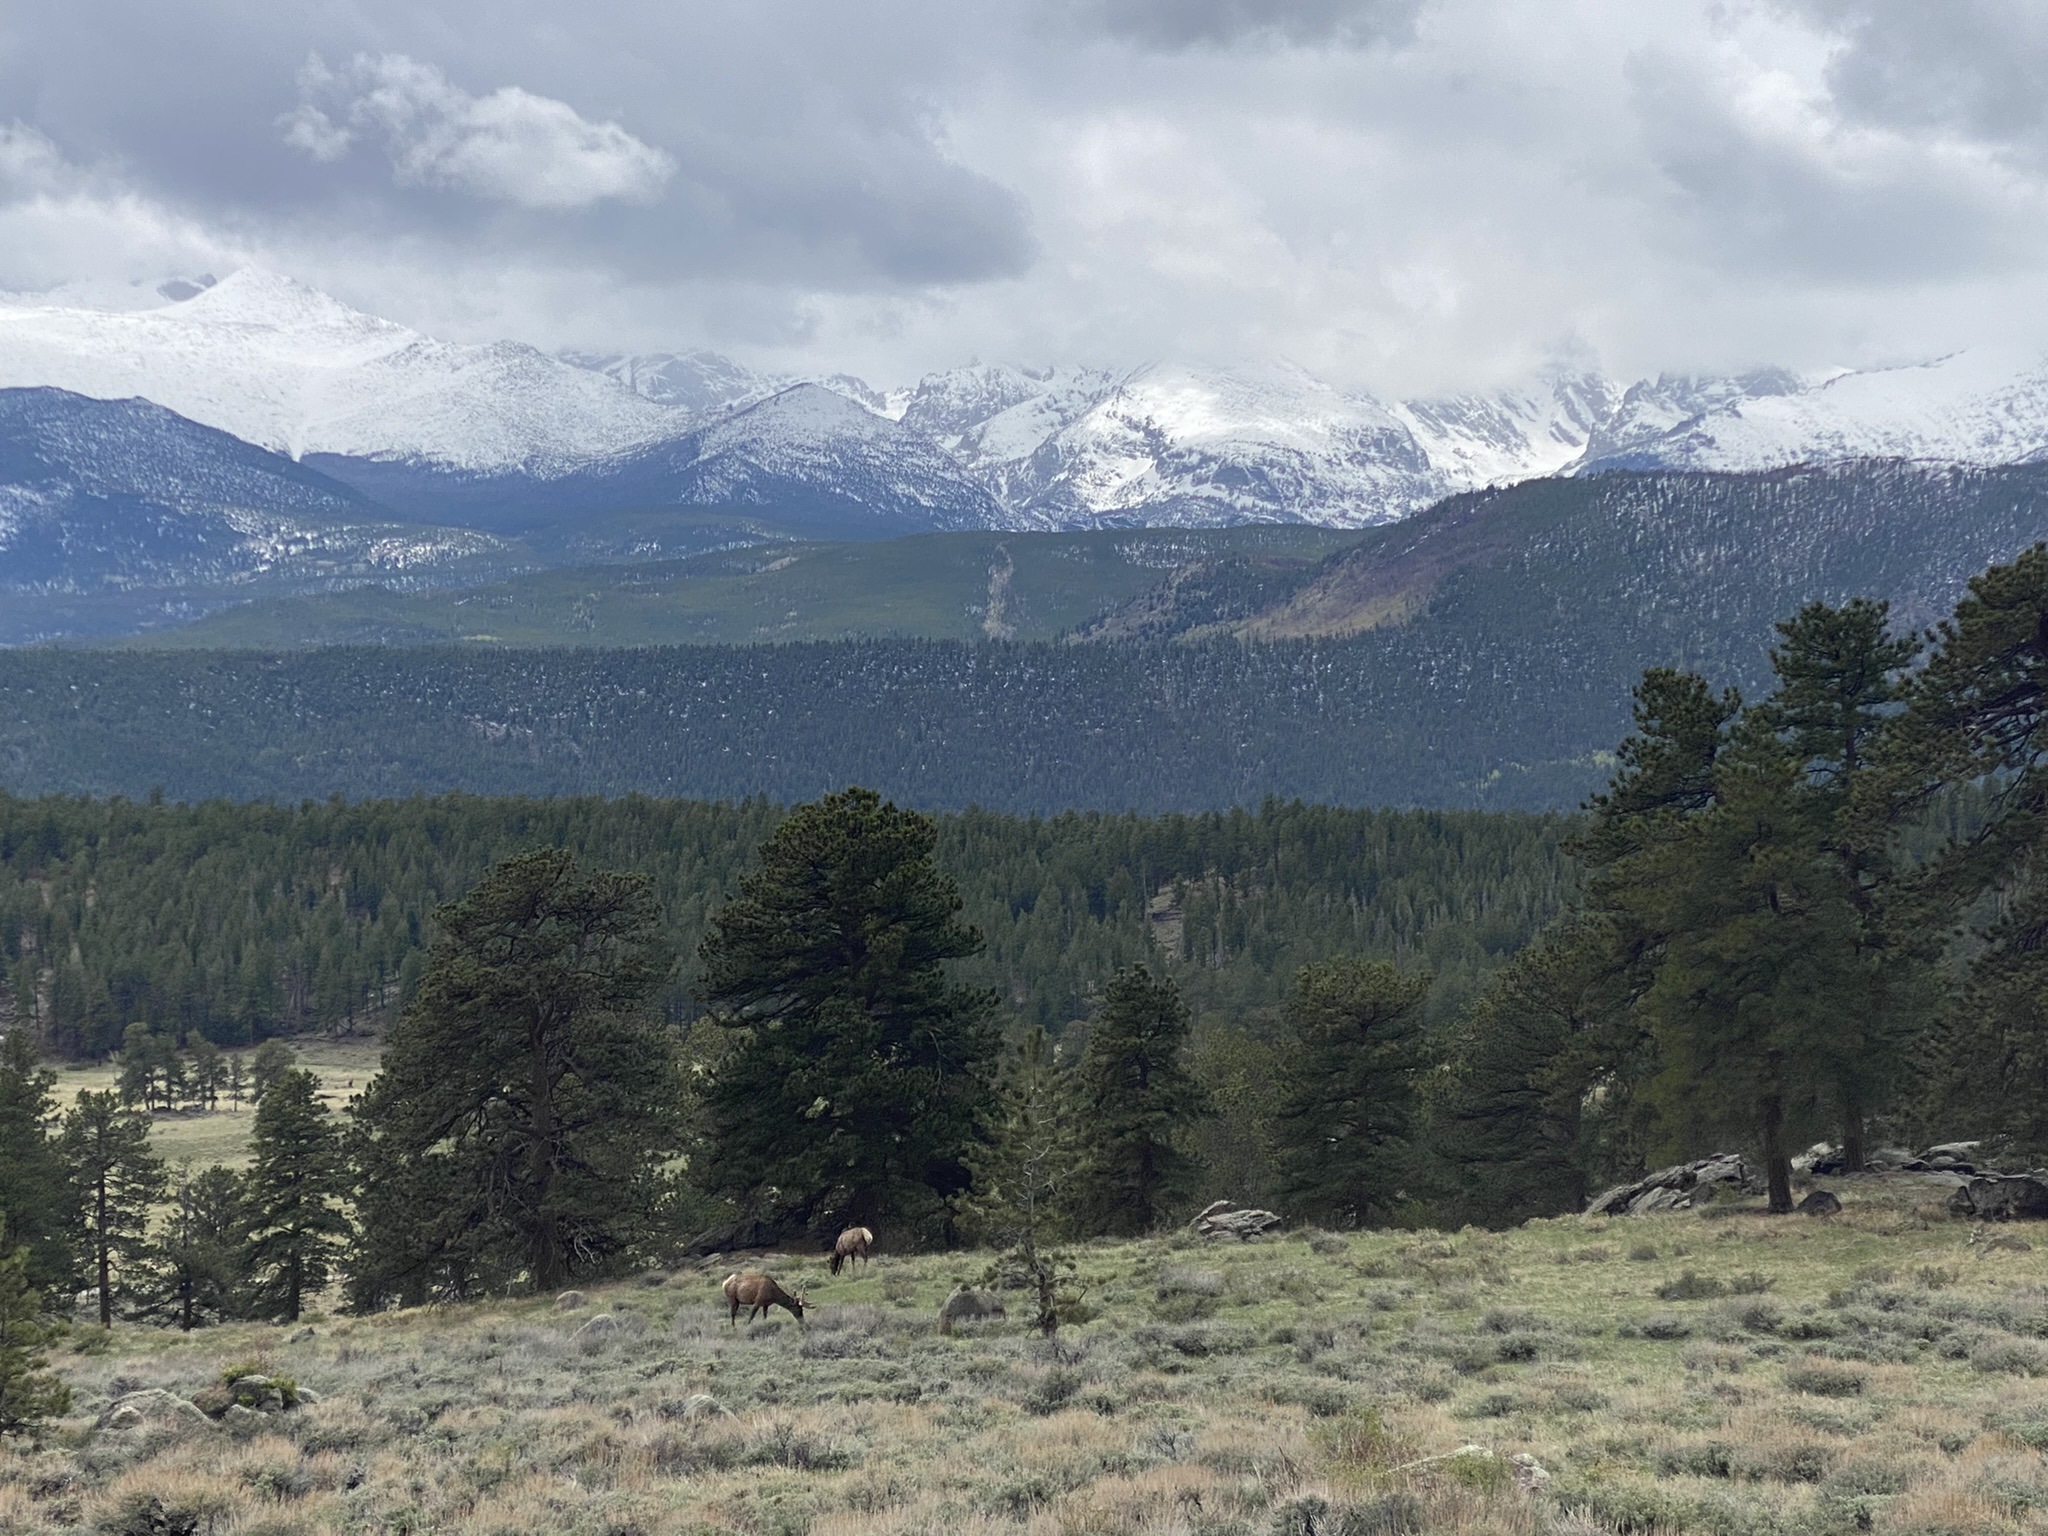
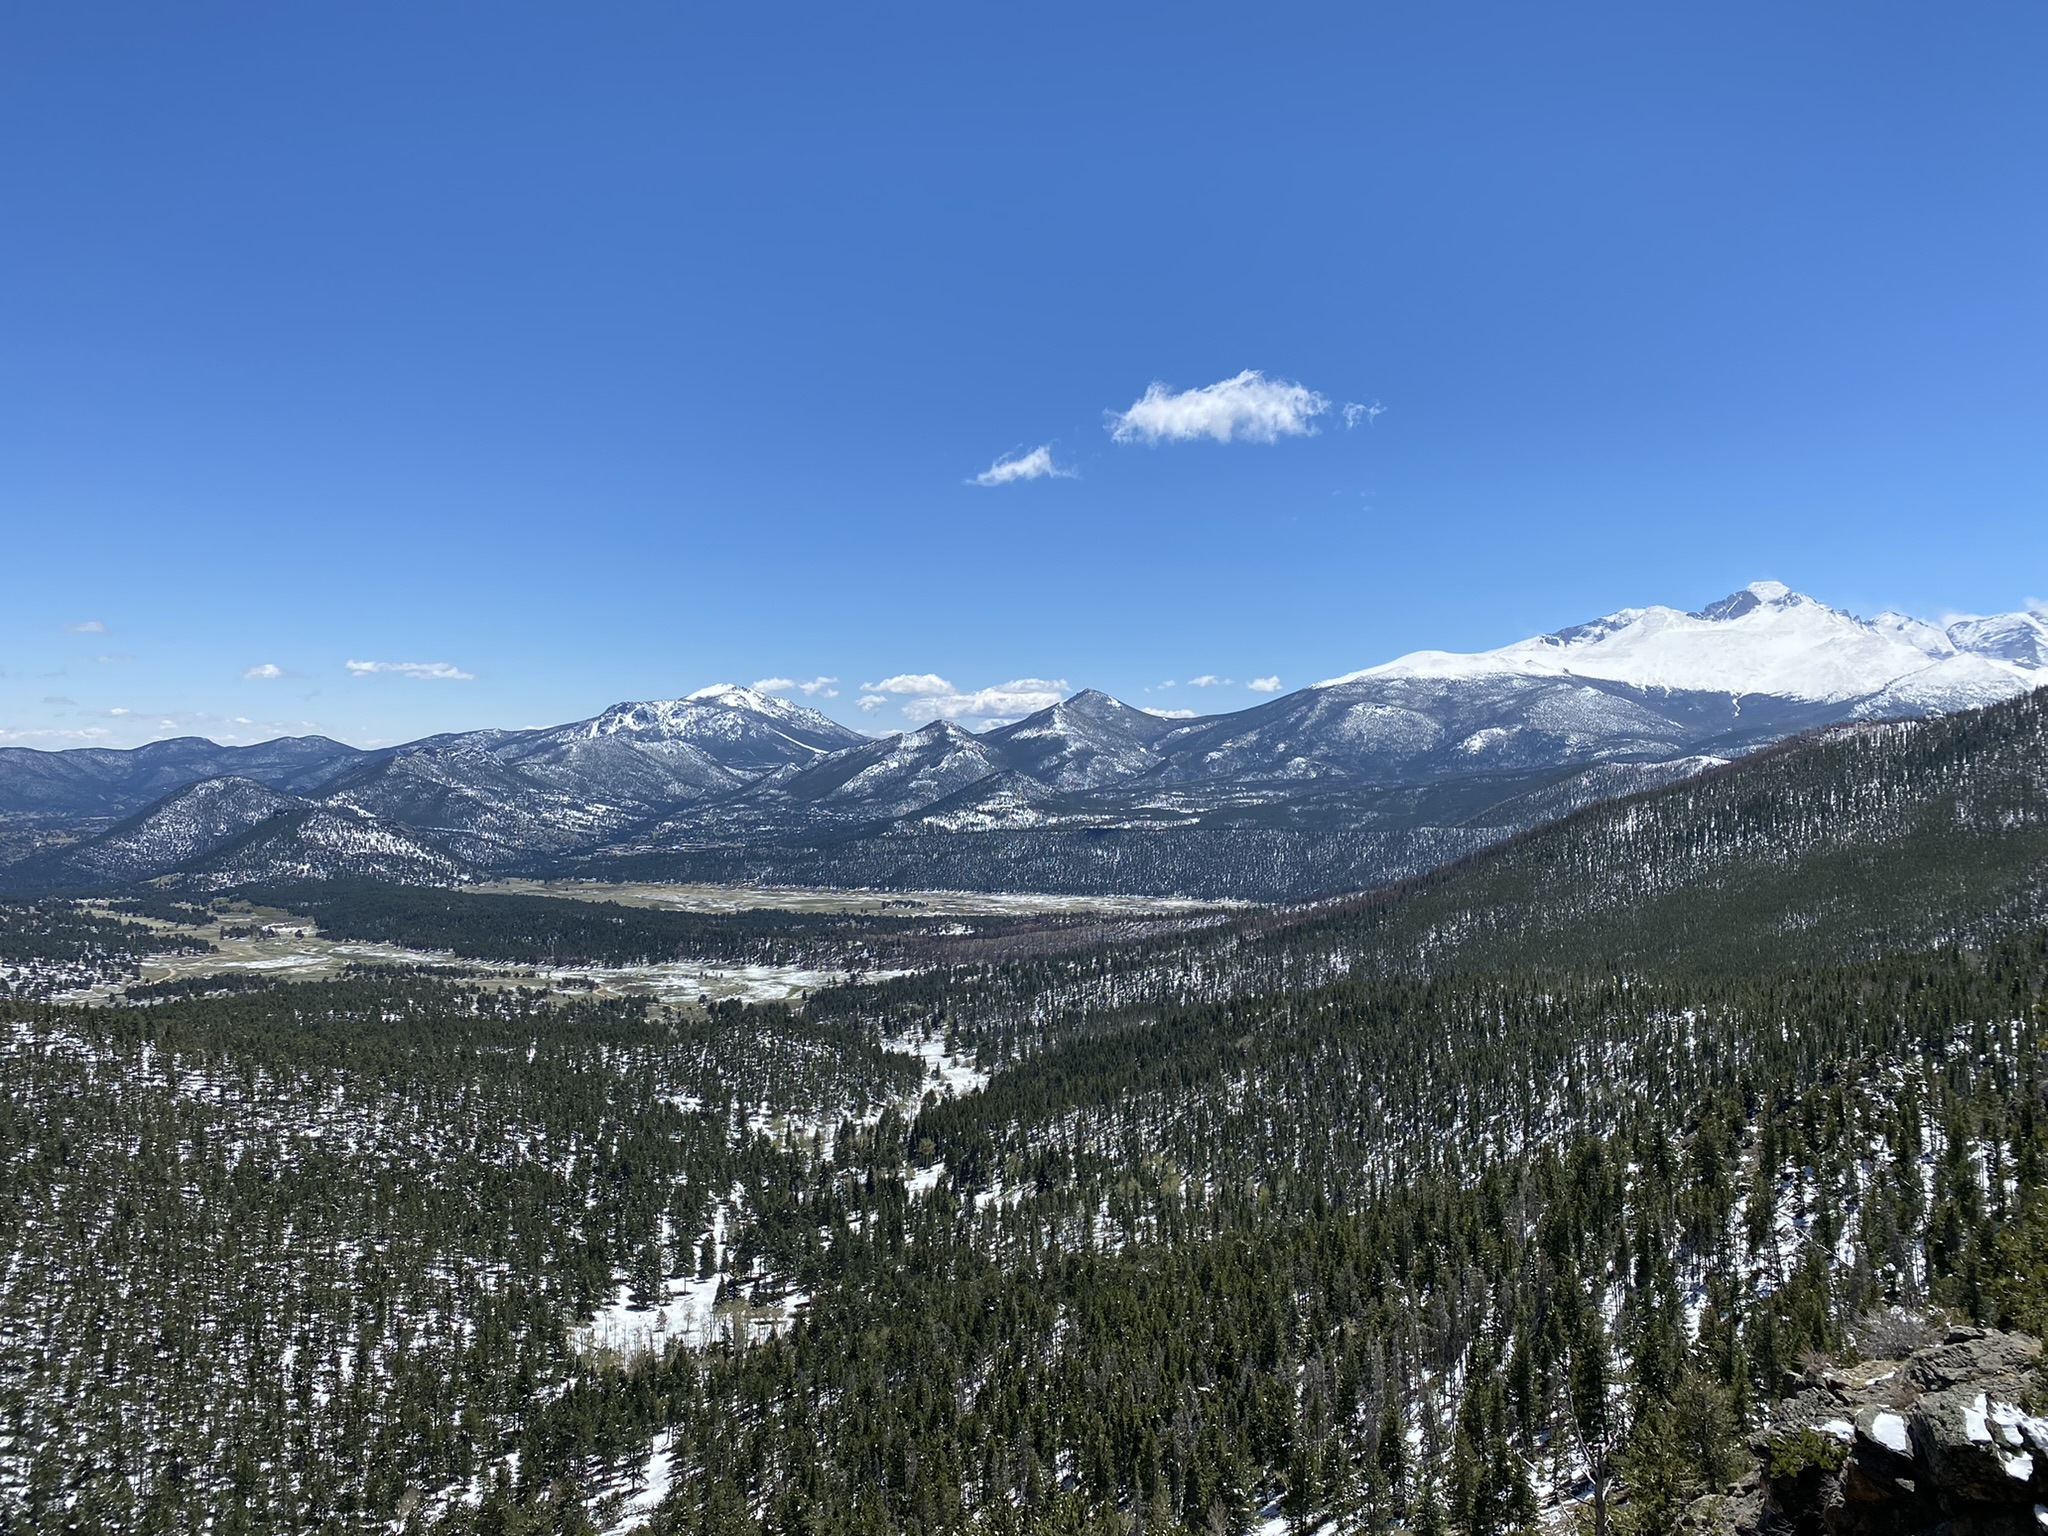
Located on the continental divide with 77 peaks above 12,000 feet, Rocky Mountain National Park in Colorado is the highest national park in the US covering 400+ square miles of wilderness. Over 4.5 million visitors explore the mountains, forests, and alpine tundra each year; each hoping to catch a glimpse of moose, elk, sheep, and maybe if a safe distance away, a bear. The park’s short 80-mile distance from Denver International Airport makes it an easy park to access no matter where you live.
You can easily plan your family’s trip to the park with this guide. We’ve gathered helpful information on entrances, entrance fees, timed entry access, the best time to visit, how to get around the park, 5, 4, 3, and 2-day itineraries, where to stay and eat, and finally 25 tips for visiting. We hope you find our guide helpful enough to share with friends.
Having immersed ourselves in the beauty of Rocky Mountain National Park, we’re thrilled to offer our family’s experiences and comprehensive research to assist you in planning an unforgettable adventure.
Without parks and outdoor life, all that is best in civilization will be smothered. To save ourselves, to prevent our perishing, to enable us to live at our best and happiest, parks are necessary. Within national parks is room -glorious room – room in which to find ourselves, in which to think and hope, to dream and plan, to rest and resolve.
Enos Mills, the “Father of Rocky Mountain National Park”
- Rocky Mountain National Park Entrances
- Entrance Fees for RMNP
- Timed – Entry to RMNP
- Best Time to Visit RMNP
- Rocky Mountain National Park Visitor Centers
- How to Get Around RMNP
- Hiking in RMNP with Kids
- 5-Day Itinerary for Visiting Rocky Mountain Park with Kids
- 2, 3, 4-Day Rocky Mountain National Park Itineraries
- Spring and Fall Rocky Mountain National Park Itineraries
- Where to Eat
- Where to Stay for Big Families Near RMNP
- 25 Tips for Visiting Rocky Mountain National Park with Kids
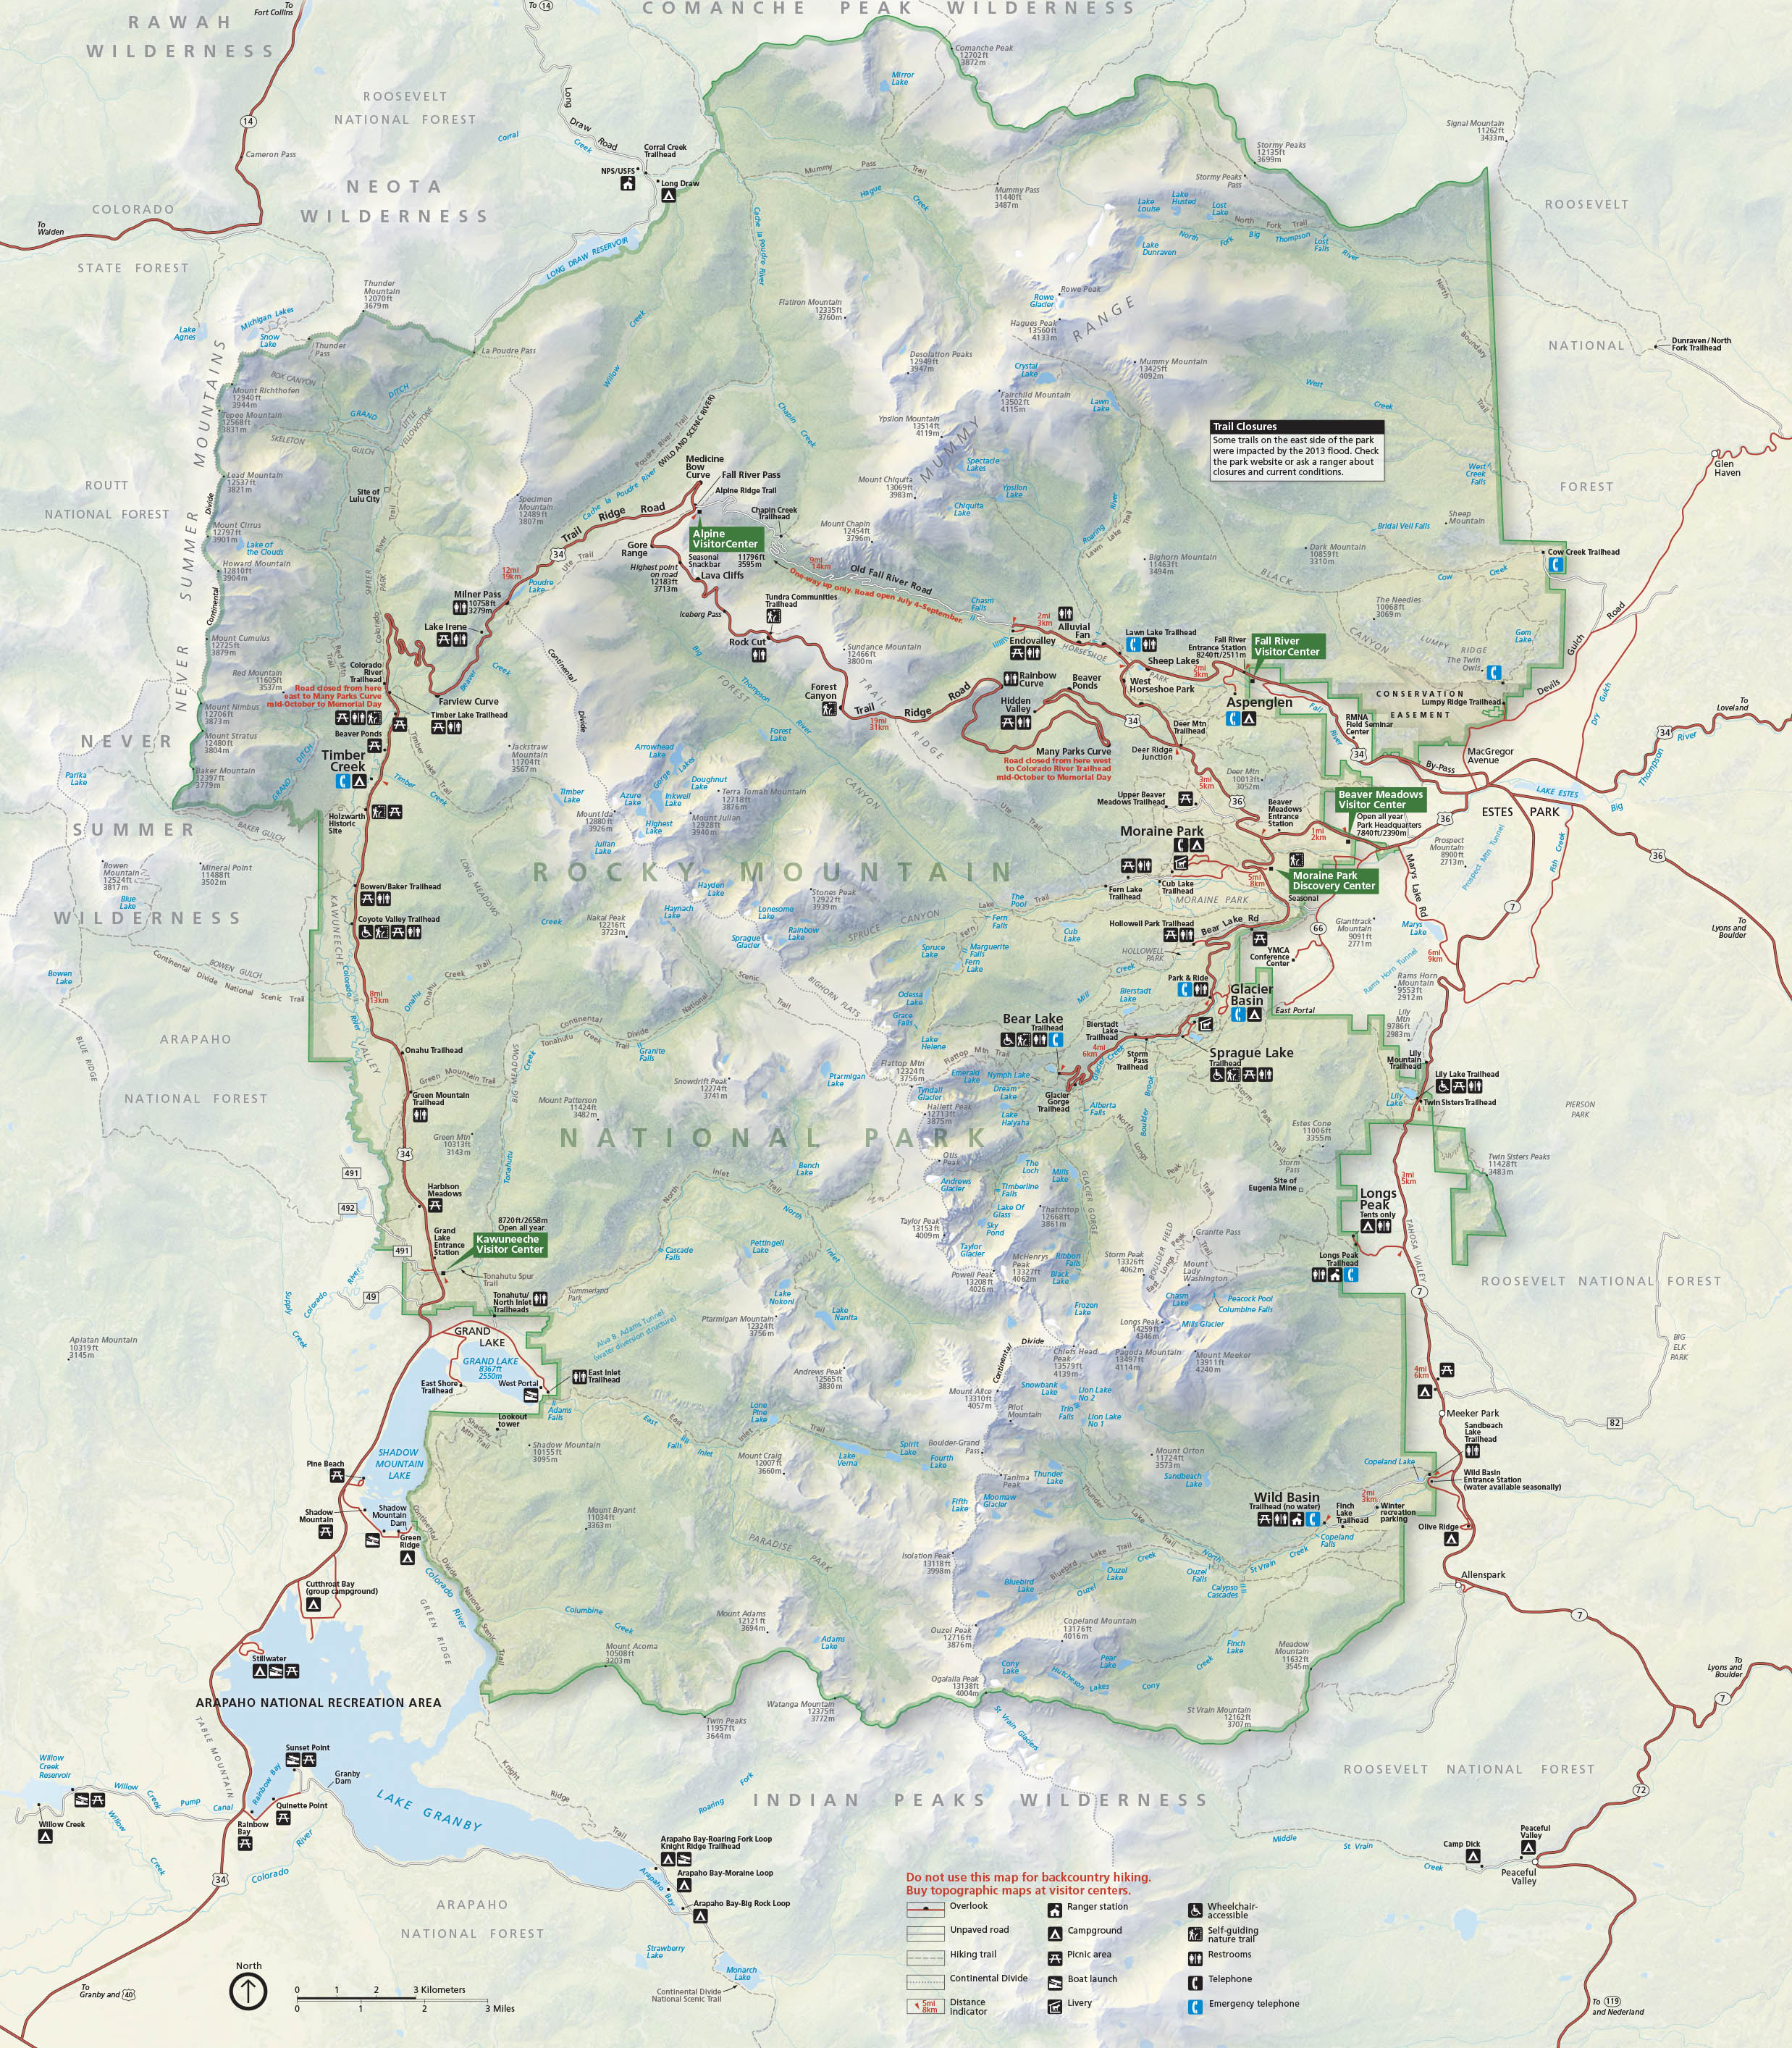
Rocky Mountain National Park Entrances
Rocky Mountain National park has four entrances, however, most visitors enter the park through the eastern entrances near Estes Park, which is about 71 miles northwest of Denver.
- Beaver Meadows Entrance – located on Highway 36, 3.5 miles west of Estes Park. This entrance usually receives the most visitors and is open all year.
- Fall River Entrance – located on Highway 34, approximately 4 miles west of Estes Park. This entrance is the closest to Trail Ridge Road. In our experience, is less busy than the Beaver Meadows Entrance.
- Wild Basin Entrance – approximately 19 miles south of Estes Park on Highway 7. The last stretch is a gravel road, sometimes a single lane.
- Grand Lake Entrance – is located two miles north of Grand Lake on the west side of the park.
Entrance Fees for RMNP
A one-day pass can be purchased for $30 but we highly recommend buying an America the Beautiful pass for $80. The pass is good for one calendar year and is your ticket to more than 2,000 federal recreation sites.
If you have a 4th grader, check out the FREE Annual 4th Grade pass which is good for the duration of the school year through the following summer (September-August).
Current U.S. military members and their dependents in the Army, Navy, Air Force, Marines, Coast Guard, and Space Force, as well as Reserve and National Guard members, qualify for a free annual pass.
Timed – Entry to RMNP
During the summer season from the Friday before Memorial Day through October, a timed-entry reservation is required along with your entry fee or annual pass to enter Rocky Mountain National Park. Two types of permit reservations are available: Park Access + which includes Bear Lake Road Corridor and allows an entry between 5 AM and 6 PM and Park Access with entry times of 9 AM to 3 PM but doesn’t include the Bear Lake Road Corridor. Both entry permits allow visitors to enter the park within two-hour time slots.
To reserve your timed entry permit, visit Recreation.gov. You’ll need to book a month in advance or chance the option of buying online the day before your trip at 5 PM (25 to 30 percent of permits are available the day before). We recommend setting up an account with Recreation.gov before your purchase and logging in at least 15 minutes before the open window. Early morning and Park Access+ reservations sell out fast. All times below are MDT.
- Reservations will become available on May 2 at 10 AM for reservations to enter the park from May 27 through June 30.
- Reservations will become available on June 1, at 10 AM for reservations to enter the park during the month of July (and any remaining days that have not been booked for June).
- Reservations will become available on July 1, at 10 AM for reservations to enter the park during the month of August (and any remaining days that have not been booked for July).
- Reservations will become available on August 1, at 10 AM for reservations to enter the park during the month of September (and any remaining days that have not been booked for August).
- Reservations will become available on September 1, at 10 AM for reservations to enter the park during the month of October (and any remaining days that have not been booked for September).
If you reserve a time slot a month ahead and want to try to get a better time the day before, you will need a second account. Recreation.gov will not allow you to buy a second timed entry for a day you already have a timed-entry reservation.
Best Time to Visit RMNP
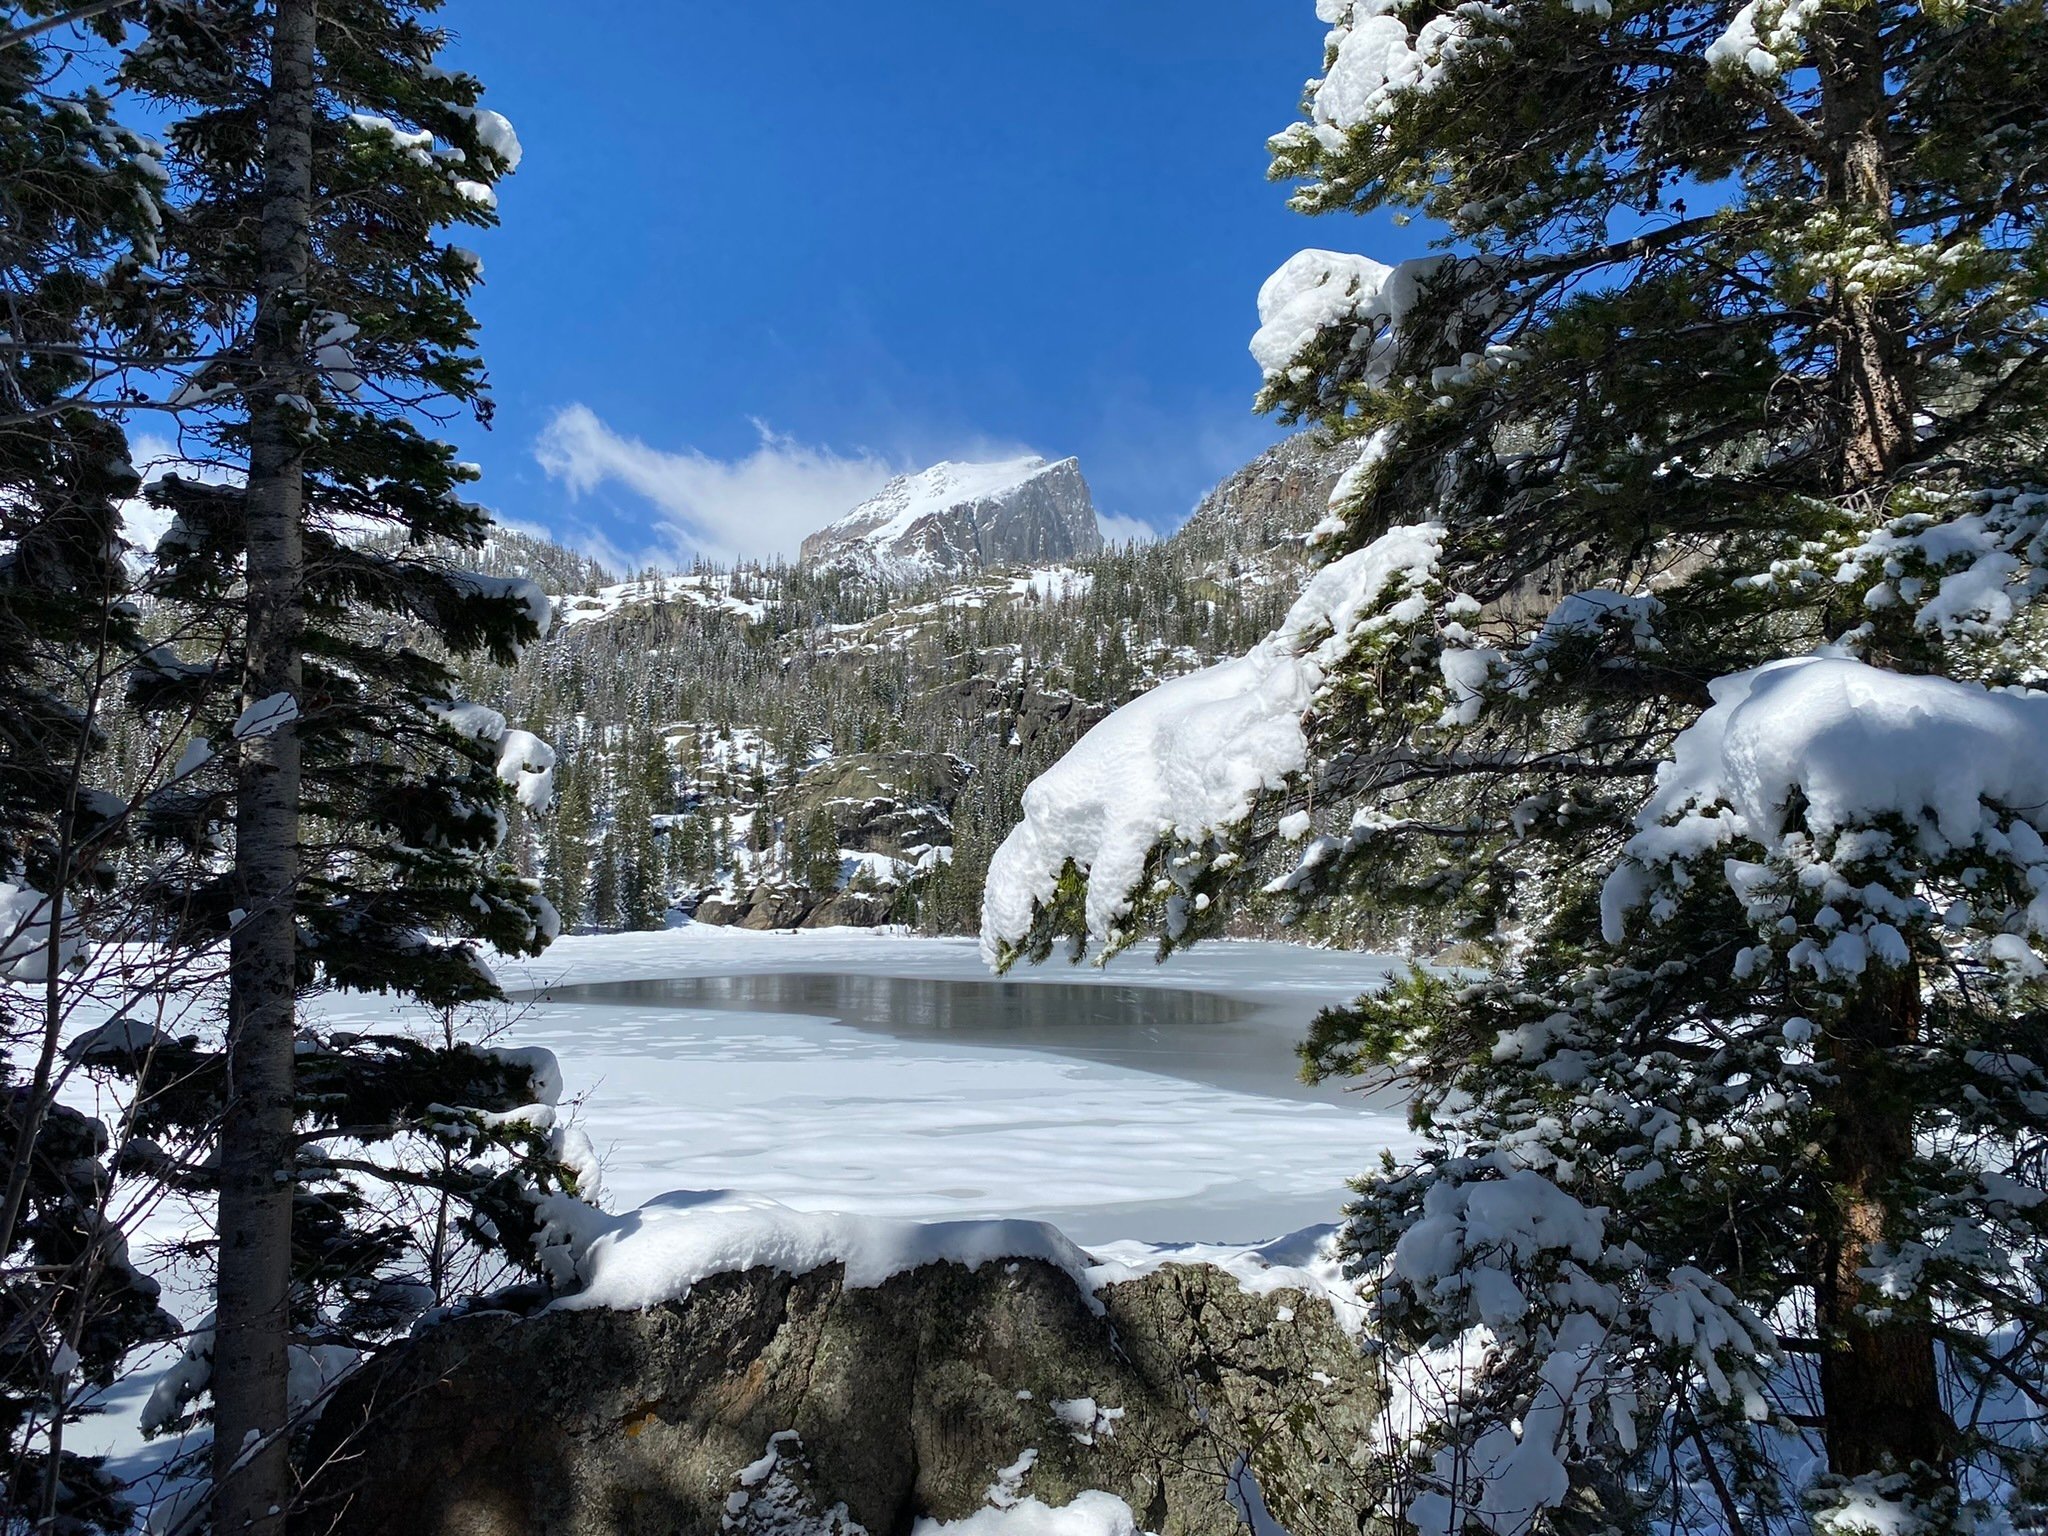
To enjoy the whole park, the best time to visit RMNP is from June to September. During this time frame, Trail Ridge Road and Old Fall River Road are open. However, it will snow whenever it wants no matter what the calendar says. Be sure to check for weather-related road closures before visiting in early spring and fall. It snowed during our visit a few days before Memorial Day. While these months are considered best, note that the park receives around 5 million visitors a year – most of them visiting during the summer months.
Visits in spring are rewarded with fuller, faster-moving falls due to snow melt. But a visit in fall has the bonus of Aspen gold color amongst the dark green spruces and firs.
Rocky Mountain National Park Visitor Centers
- Beaver Meadows Visitor Center – Located outside the park gate 60 US 36, watch a film about the history of the park and view a relief model of the park. Flush toilet restrooms.
- Fall River Visitor Center – Located outside the park gate on US 34, enjoy wildlife displays and explore the children’s discovery room. Facilities include a restaurant, store, and gifts. Flush toilet restrooms.
- Moraine Park Discovery Center – Located on Bear Lake Road, the center offers hands-on exhibits designed by the Denver Museum of Nature and Science. Flush toilet restrooms.
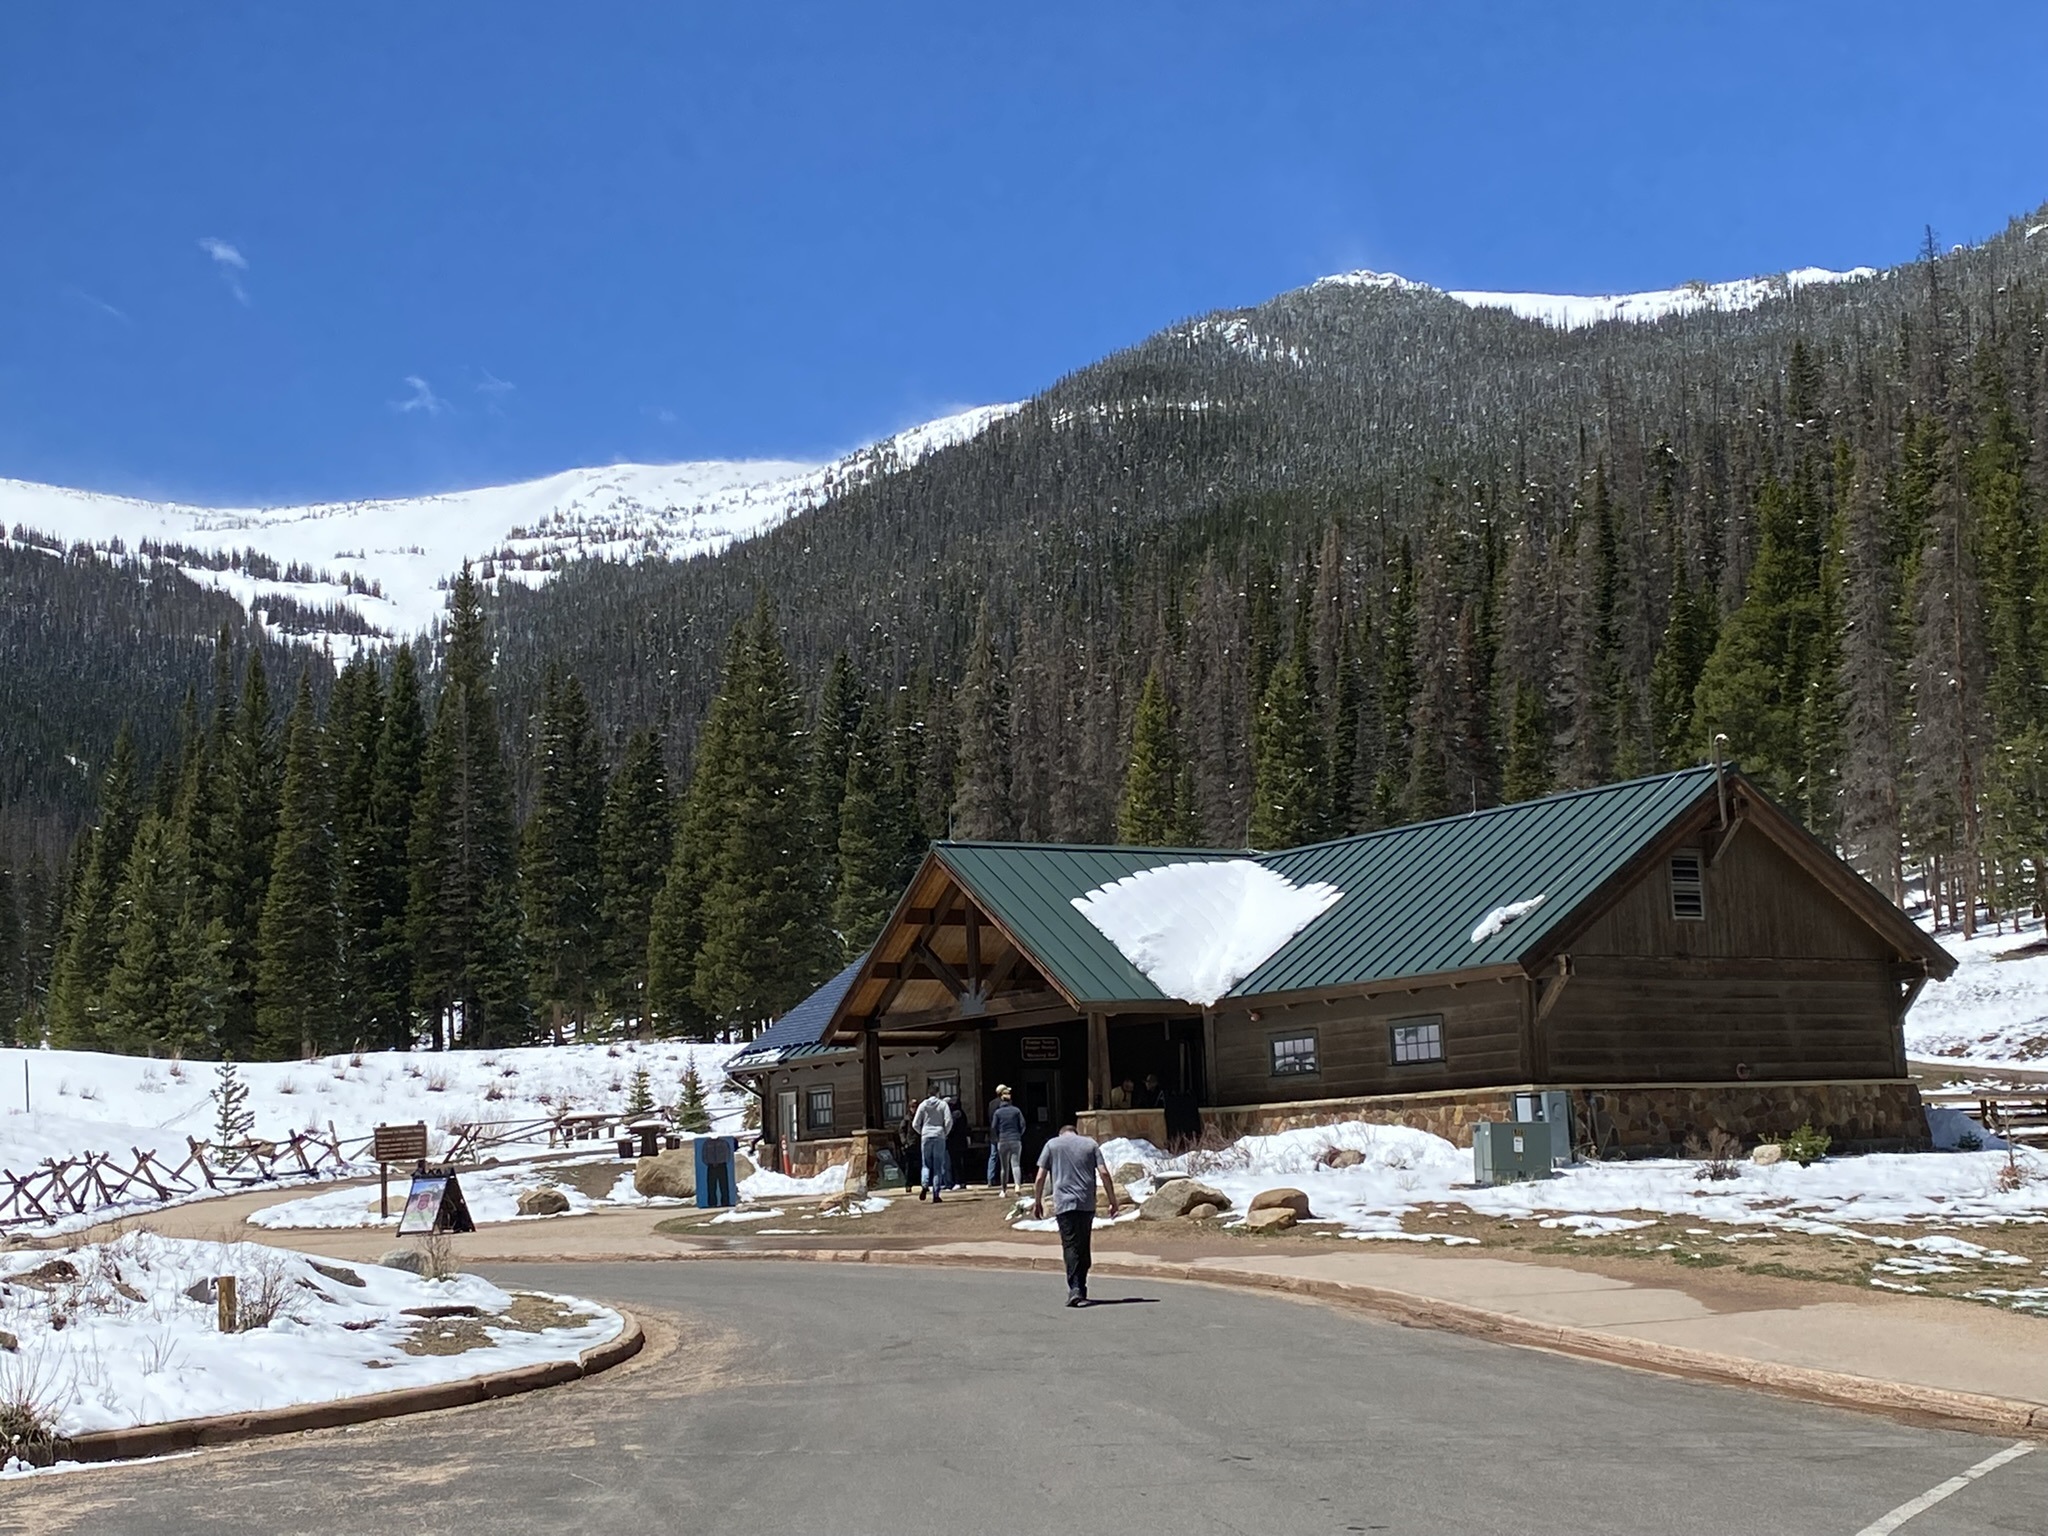
- Kewauneeche Visitor Center – The only visitor center on the west side before reaching Alpine, enjoy educational exhibits and films. Flush toilet restrooms.
- Alpine Visitor Center – Open whenever Trail Ridge Road is cleared. Facilities include a cafeteria, gift shop, maps, and tundra exhibits. Vault toilets.
- Sheeps Lake Information Station – Located in Horseshoe Park just beyond Fall River Entrance.
- Holzwarth Historic Site – Explore a 1920’s-era dude ranch and learn about early homesteading and tourism.
How to Get Around RMNP
Shuttle Buses
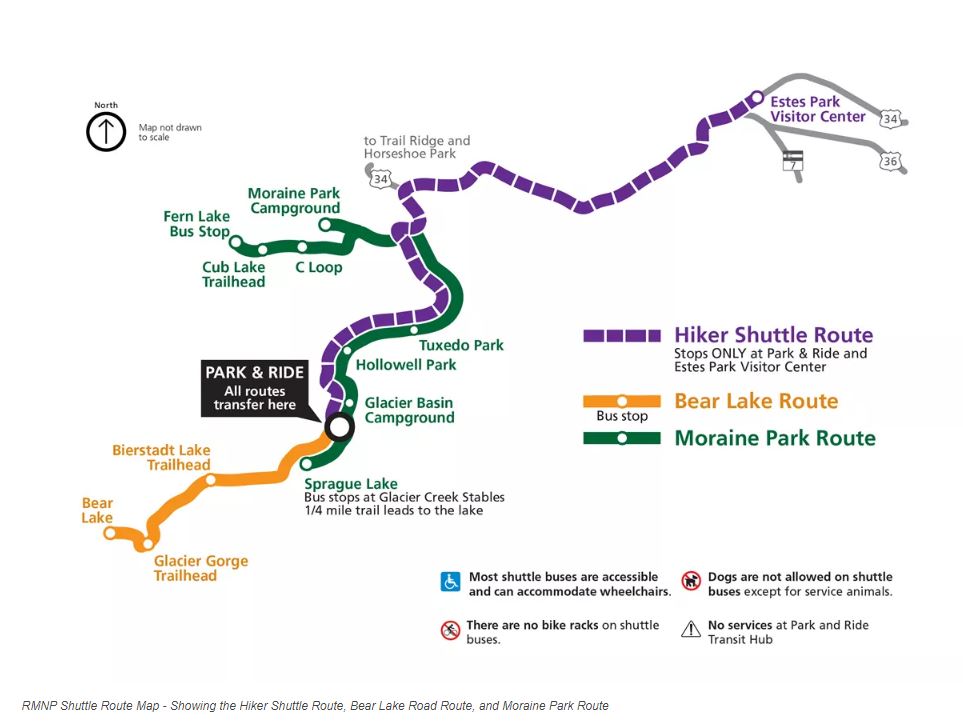
RMNP offers a shuttle into the park (fee) and two free shuttles within the park. Although the shuttles only cover some of the east side of the park, they are a decent option if you aren’t able to snag a timed-entry reservation.
Hiker Shuttle Route from Estes Park to RMNP
Hiker Shuttle provides service from the Estes Park Visitor Center to Rocky Mountain National Park’s Park & Ride Transit Hub, located on Bear Lake Road. Once at Park & Ride, passengers may transfer to Bear Lake or Moraine Park Shuttles to reach desired trailhead destinations.
To ride Hiker Shuttle, you’ll need a Hike Shuttle Reservation plus a valid pass. Hiker Shuttle reservations, $2, are purchased through Recreation.gov. Note, you will need two or more passes as each reservation is only good for 4 passengers. AND you can not buy more than one pass per day per site account, so you’ll also need a second or third account.
Free In-Park Shuttles
Parking lots often fill early in the day along the below routes. Park at the large Park & Ride parking lot to ride the free shuttles to the below trailheads.
- Bear Lake Shuttle Route makes stops at the Park & Ride, Bierstadt Lake Trailhead, Glacier Gorge Trailhead, and Bear Lake
- Moraine Park Shuttle Route makes stops at the Park & Ride, Sprague Lake/Glacier Creek Stables, Hollowell Park, Tuxedo Park, Moraine Park Campground (C Loop), Cub Lake Trailhead, Fern Lake Bus Stop
Personal Vehicle
Keep the park map you receive when you go through the gate handy to help you get around the park. Explore every pullout and turn, you never know what you’ll see. For example, you might not plan on hiking at Cub Lake Trailhead but take the road down there to see the area. Every stop in the park is a good stop.
Hiking in RMNP with Kids
The park has over 350 miles of trails with various lengths and difficulties. When choosing which hikes to complete, take into account not only the distance but also the elevation gain. Check out our list of 16 easy and moderate hikes in RMNP to enjoy with kids.

5-Day Itinerary for Visiting Rocky Mountain Park with Kids
How much time you schedule to cover the park depends on the time of year, what parts of the park are open, your travel style, and how much your family likes to hike. If your visit is between late October and most of May, a 2-day itinerary of the more popular east side of the park will cover most of everything available to you. During the summer months, all the roads should be open and you can explore the whole park.
Our 5-day itinerary starts from Estes Park where most visitors enter the park and fully covers the park. Two, three, and four-day itineraries can be made by combining or eliminating days. We’ll outline those further down.
Day 1 – Upper Loop
For your first day at Rocky Mountain National Park, your schedule includes a loop from Estes Park to the Fall River Entrance to Endovalley to Beaver Meadows Entrance, and back into Estes. Enter the park through the Fall River Entrance Station and stop at Sheep Lakes, be on the lookout for bighorn sheep who visit the lake and meadow regularly.

Continue on to Alluvial Fan, and hike the short walk up to view the cascades of Horseshoe Falls over the boulder field.
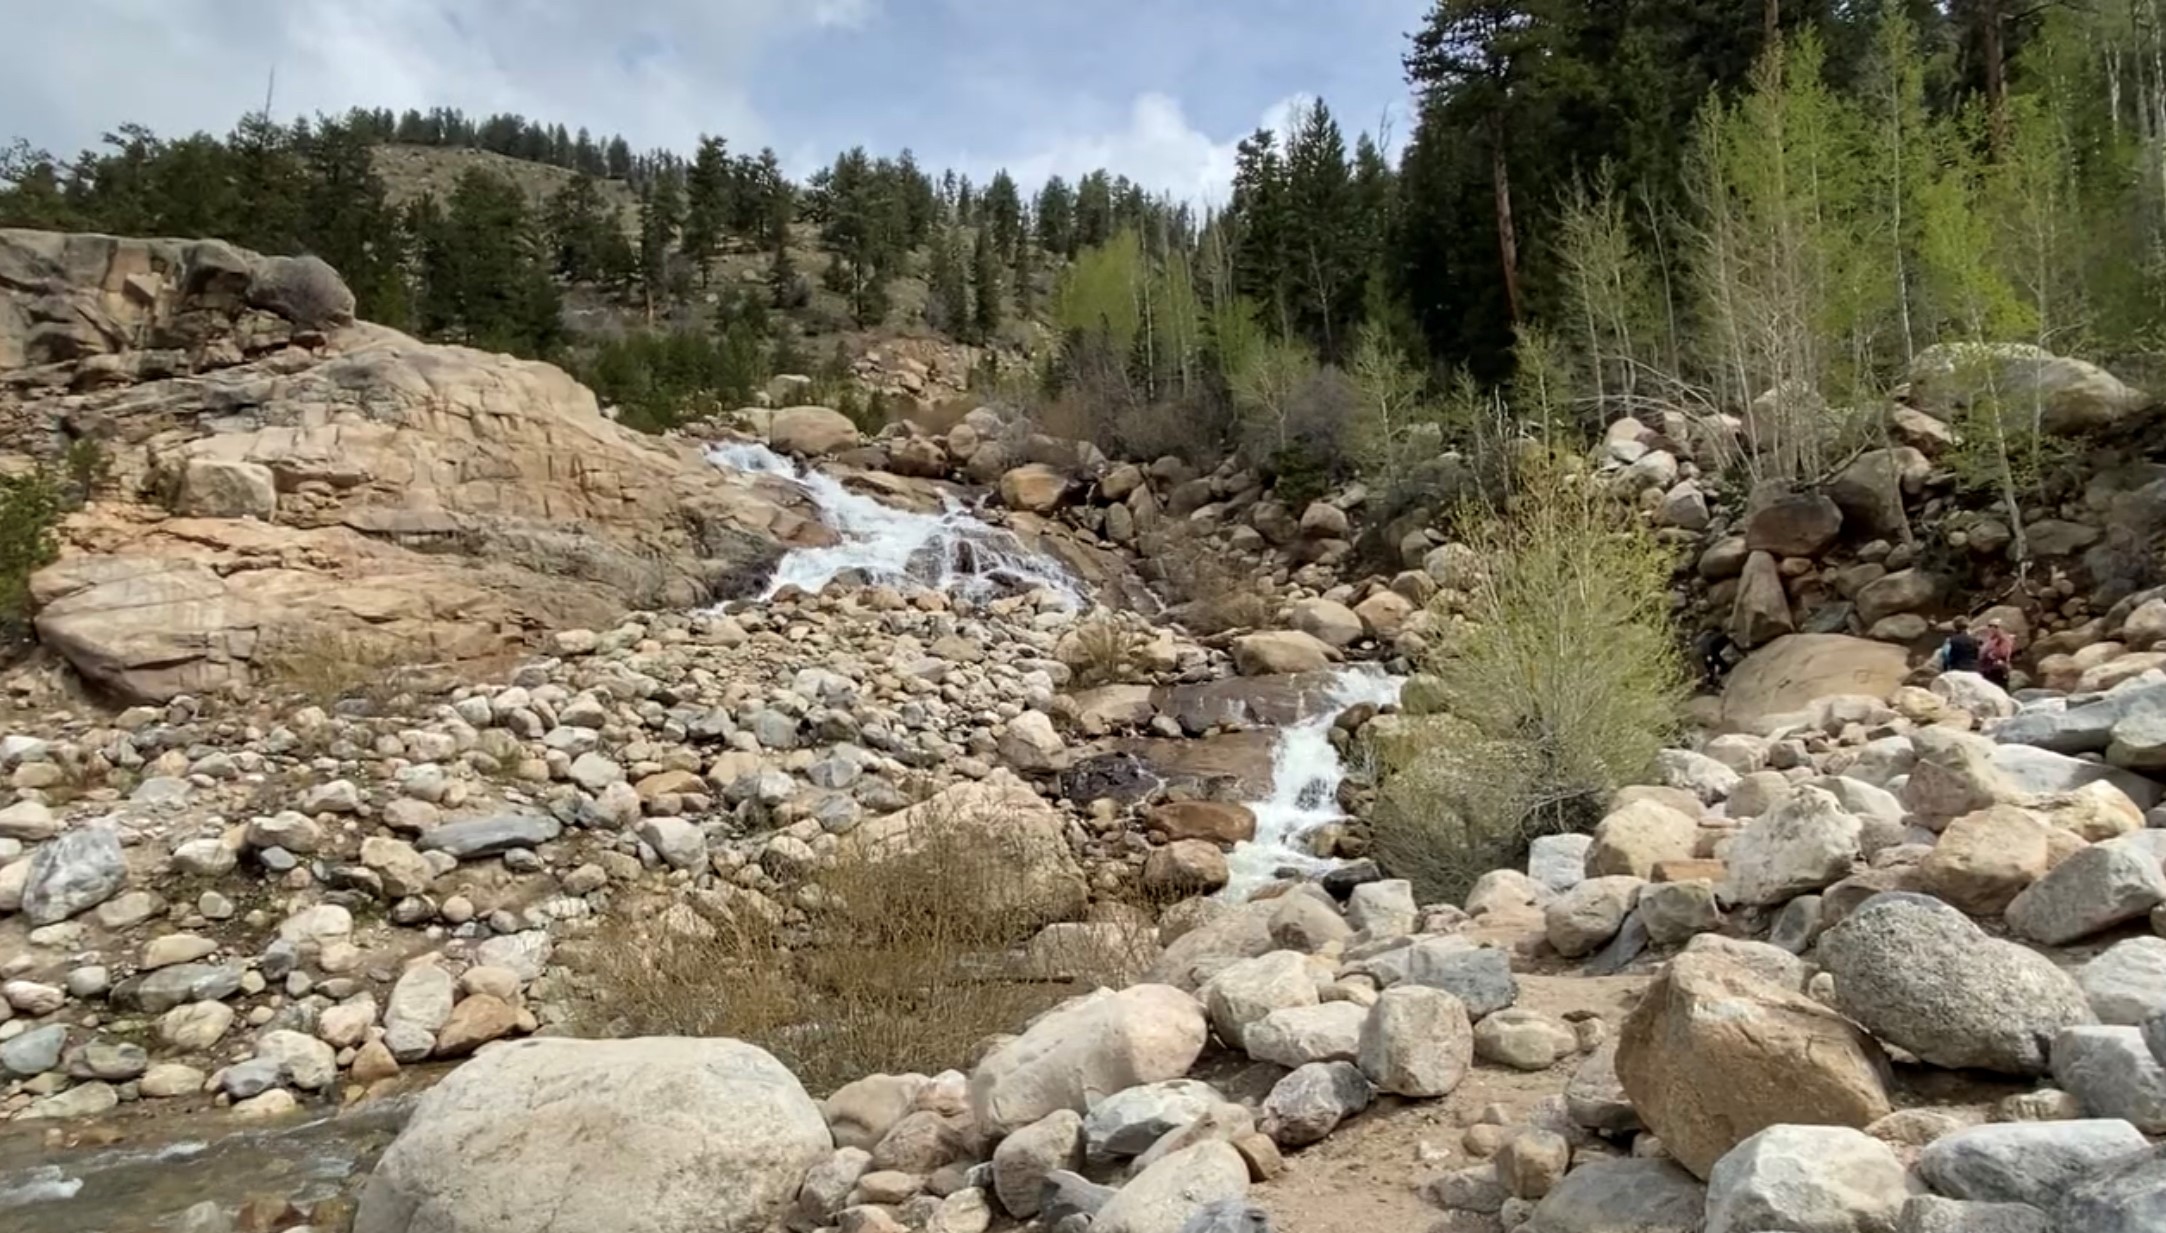
During spring and fall, the road to Old Fall River Road will be closed here. If open, continue on to Endovalley to take the 3.8-mile hike to Chasm Falls. Otherwise, turn back to head to West Horseshoe Park.
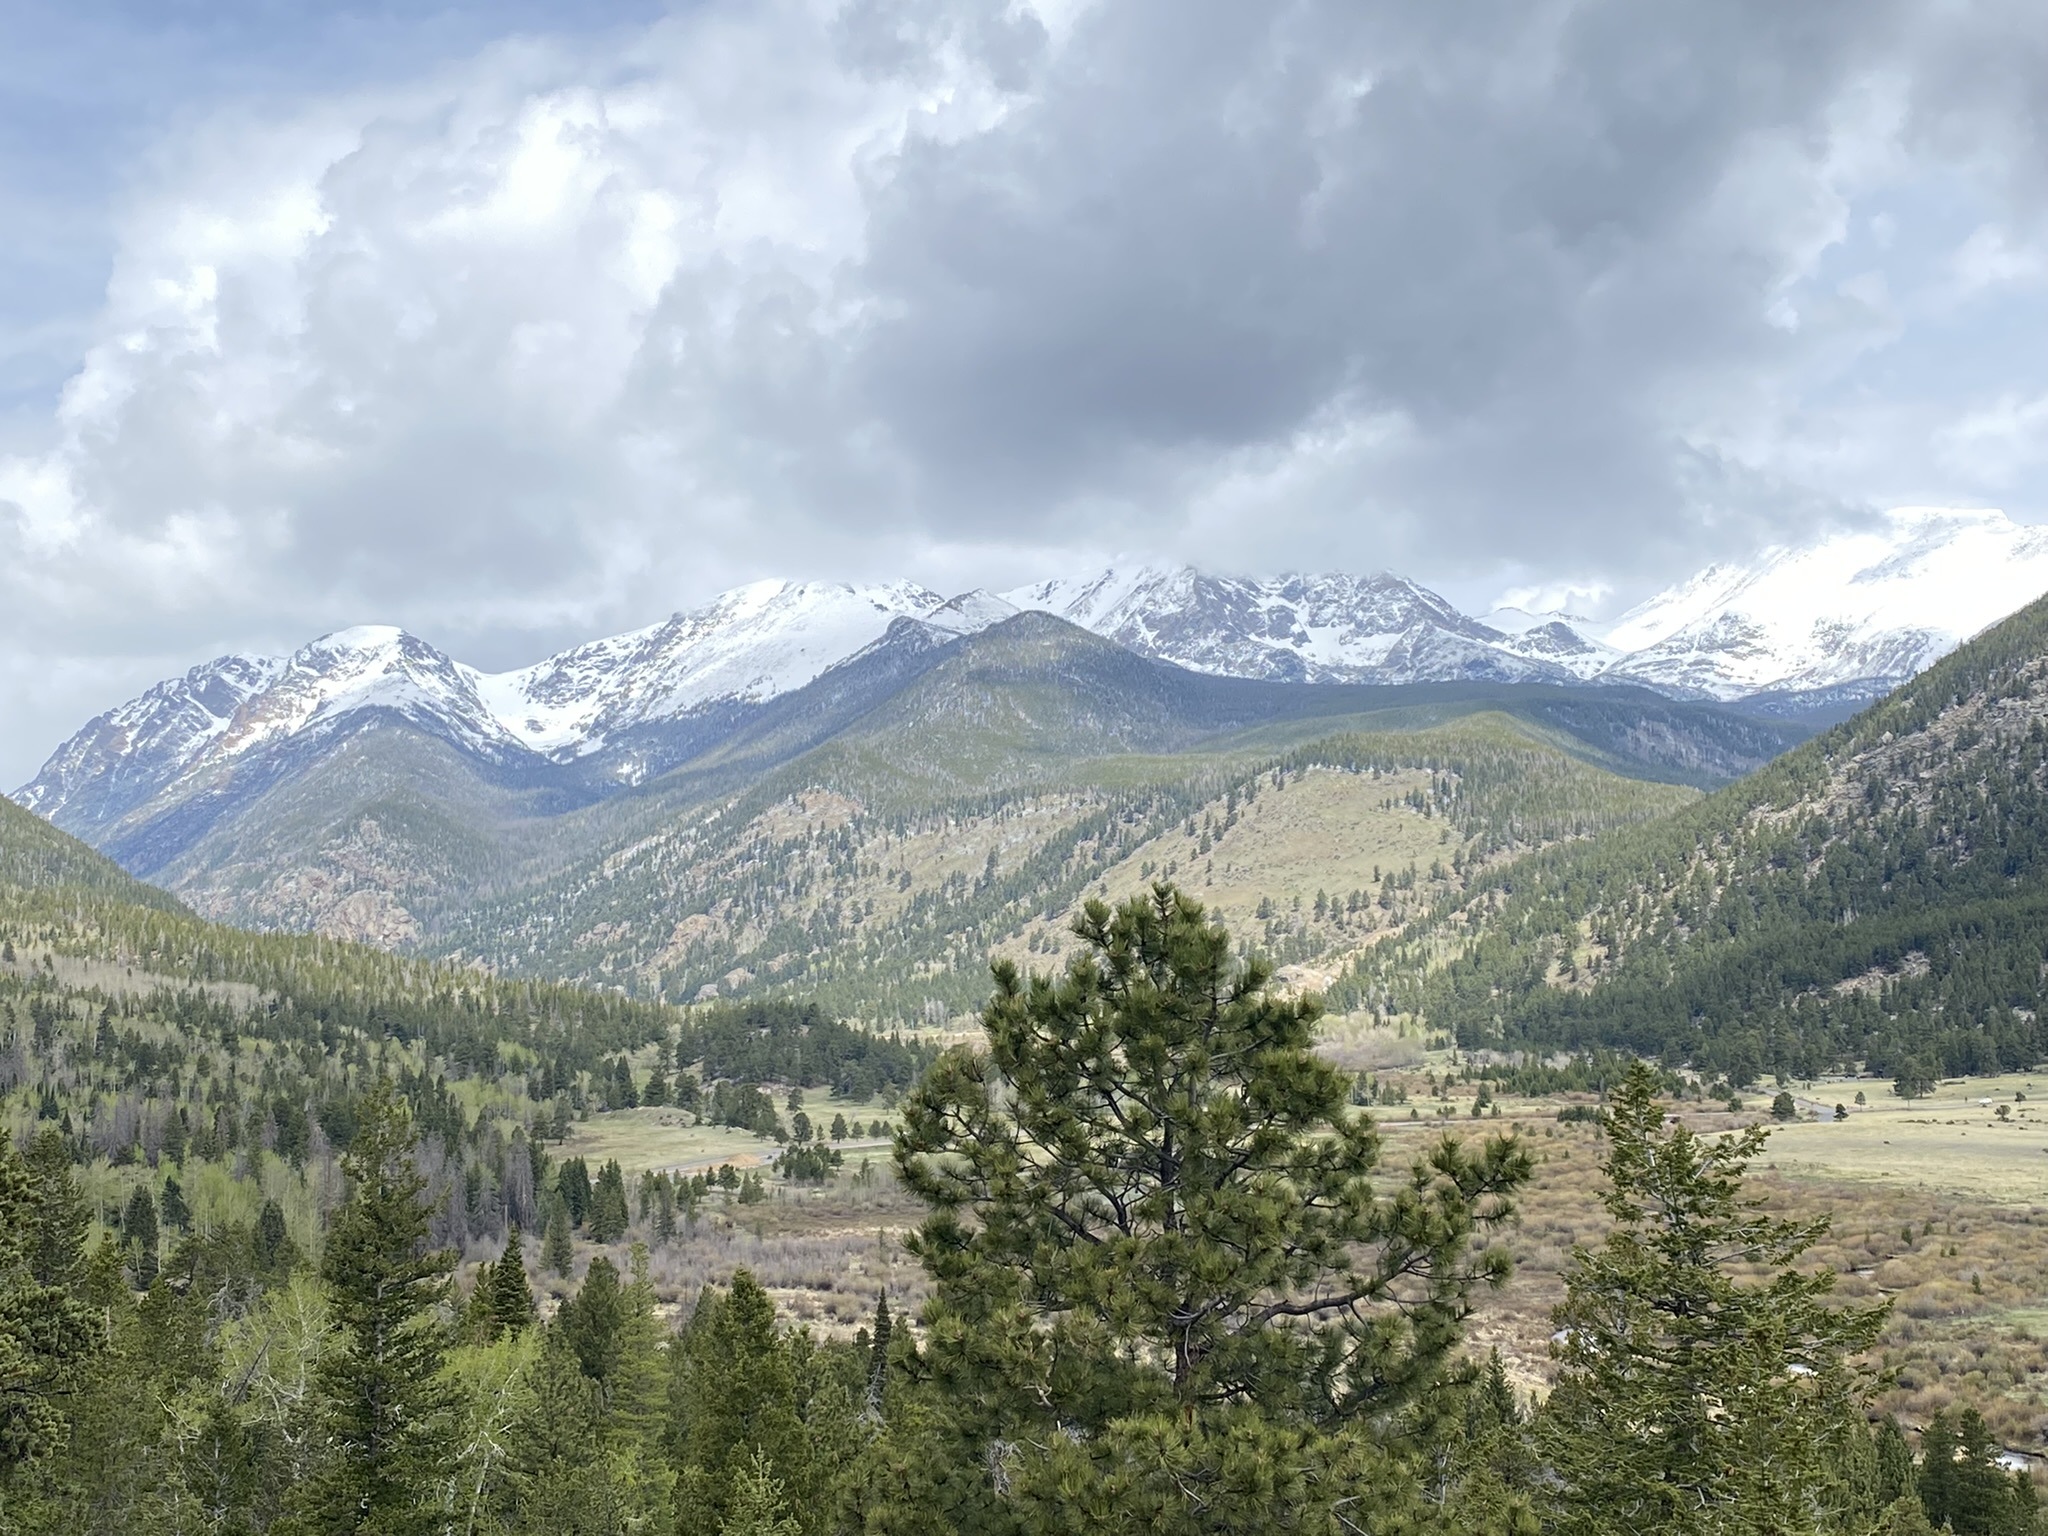
Stop at the two overlooks to take in views of Fall River, Mount Chapin (12,454 feet), Mount Chiquita (13,069 feet), Ypsilon Mountain (13,514 feet), Fairchild Mountain (13,502 feet), and Bighorn Mountian (11,463 feet).
If you visit in the shoulder season or to fill out your day, take a right at Deer Ridge Junction to take Highway 34 as far as the road is open, usually to Many Parks Curve. Stop at Beaver Ponds to walk the short 0.2-mile roundtrip boardwalk through a wetland environment.
Stop at Hidden Valley for a pit stop with flush toilets and if there’s still snow on the ground, a chance to sled down an old bunny hill of Hidden Valley Ski Area which closed in 1991.
Hop back in the car and continue to Many Parks Curve. Two parking lots are available, one on each side of the curve. Bask in the panoramic views of Estes Park, Moraine Park, Upper Beaver Meadows, and Horseshoe Park. In the distance from left to right you’ll see Twin Sisters, Lily Mountain, Estes Cone, Battle Mountain, Mount Meeker, Longs Peak, Chiefs Head Peak, and McHenry’s Peak.
Head back east towards Deer Ridge Junction to continue on Highway 36 towards Beaver Meadows Entrance. Before you leave the park turn off and drive down to the Upper Beaver Meadows Trailhead. Get a few steps in at this short 1.1-mile loop. Be sure to take the smaller loop as the larger loop is 4.3 miles, check the information placard at the trailhead.
Finalize the loop by driving to Beaver Meadows Entrance, visiting the visitor center, and then heading back to Estes Park.
Day 2 – Bear Lake Corridor

If you booked Park Acess+ or plan on taking the in-park shuttle, get up as early as your crew will allow heading to the Bear Lake Corridor of the park. Today’s schedule includes several easy to moderate hikes. We suggest making Bear Lake Trailhead at the end of the road your first stop. While the parking lot here is large, it fills up fast each morning.

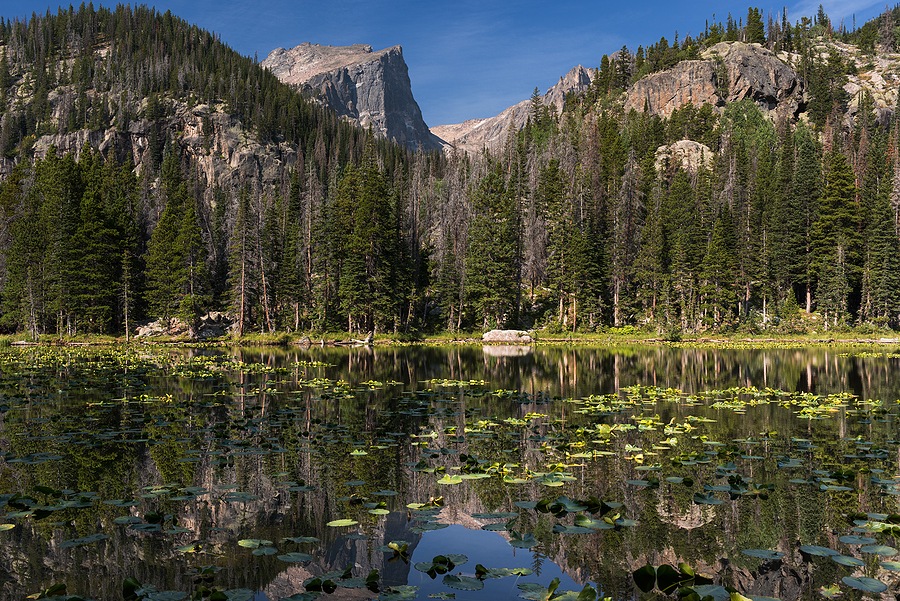
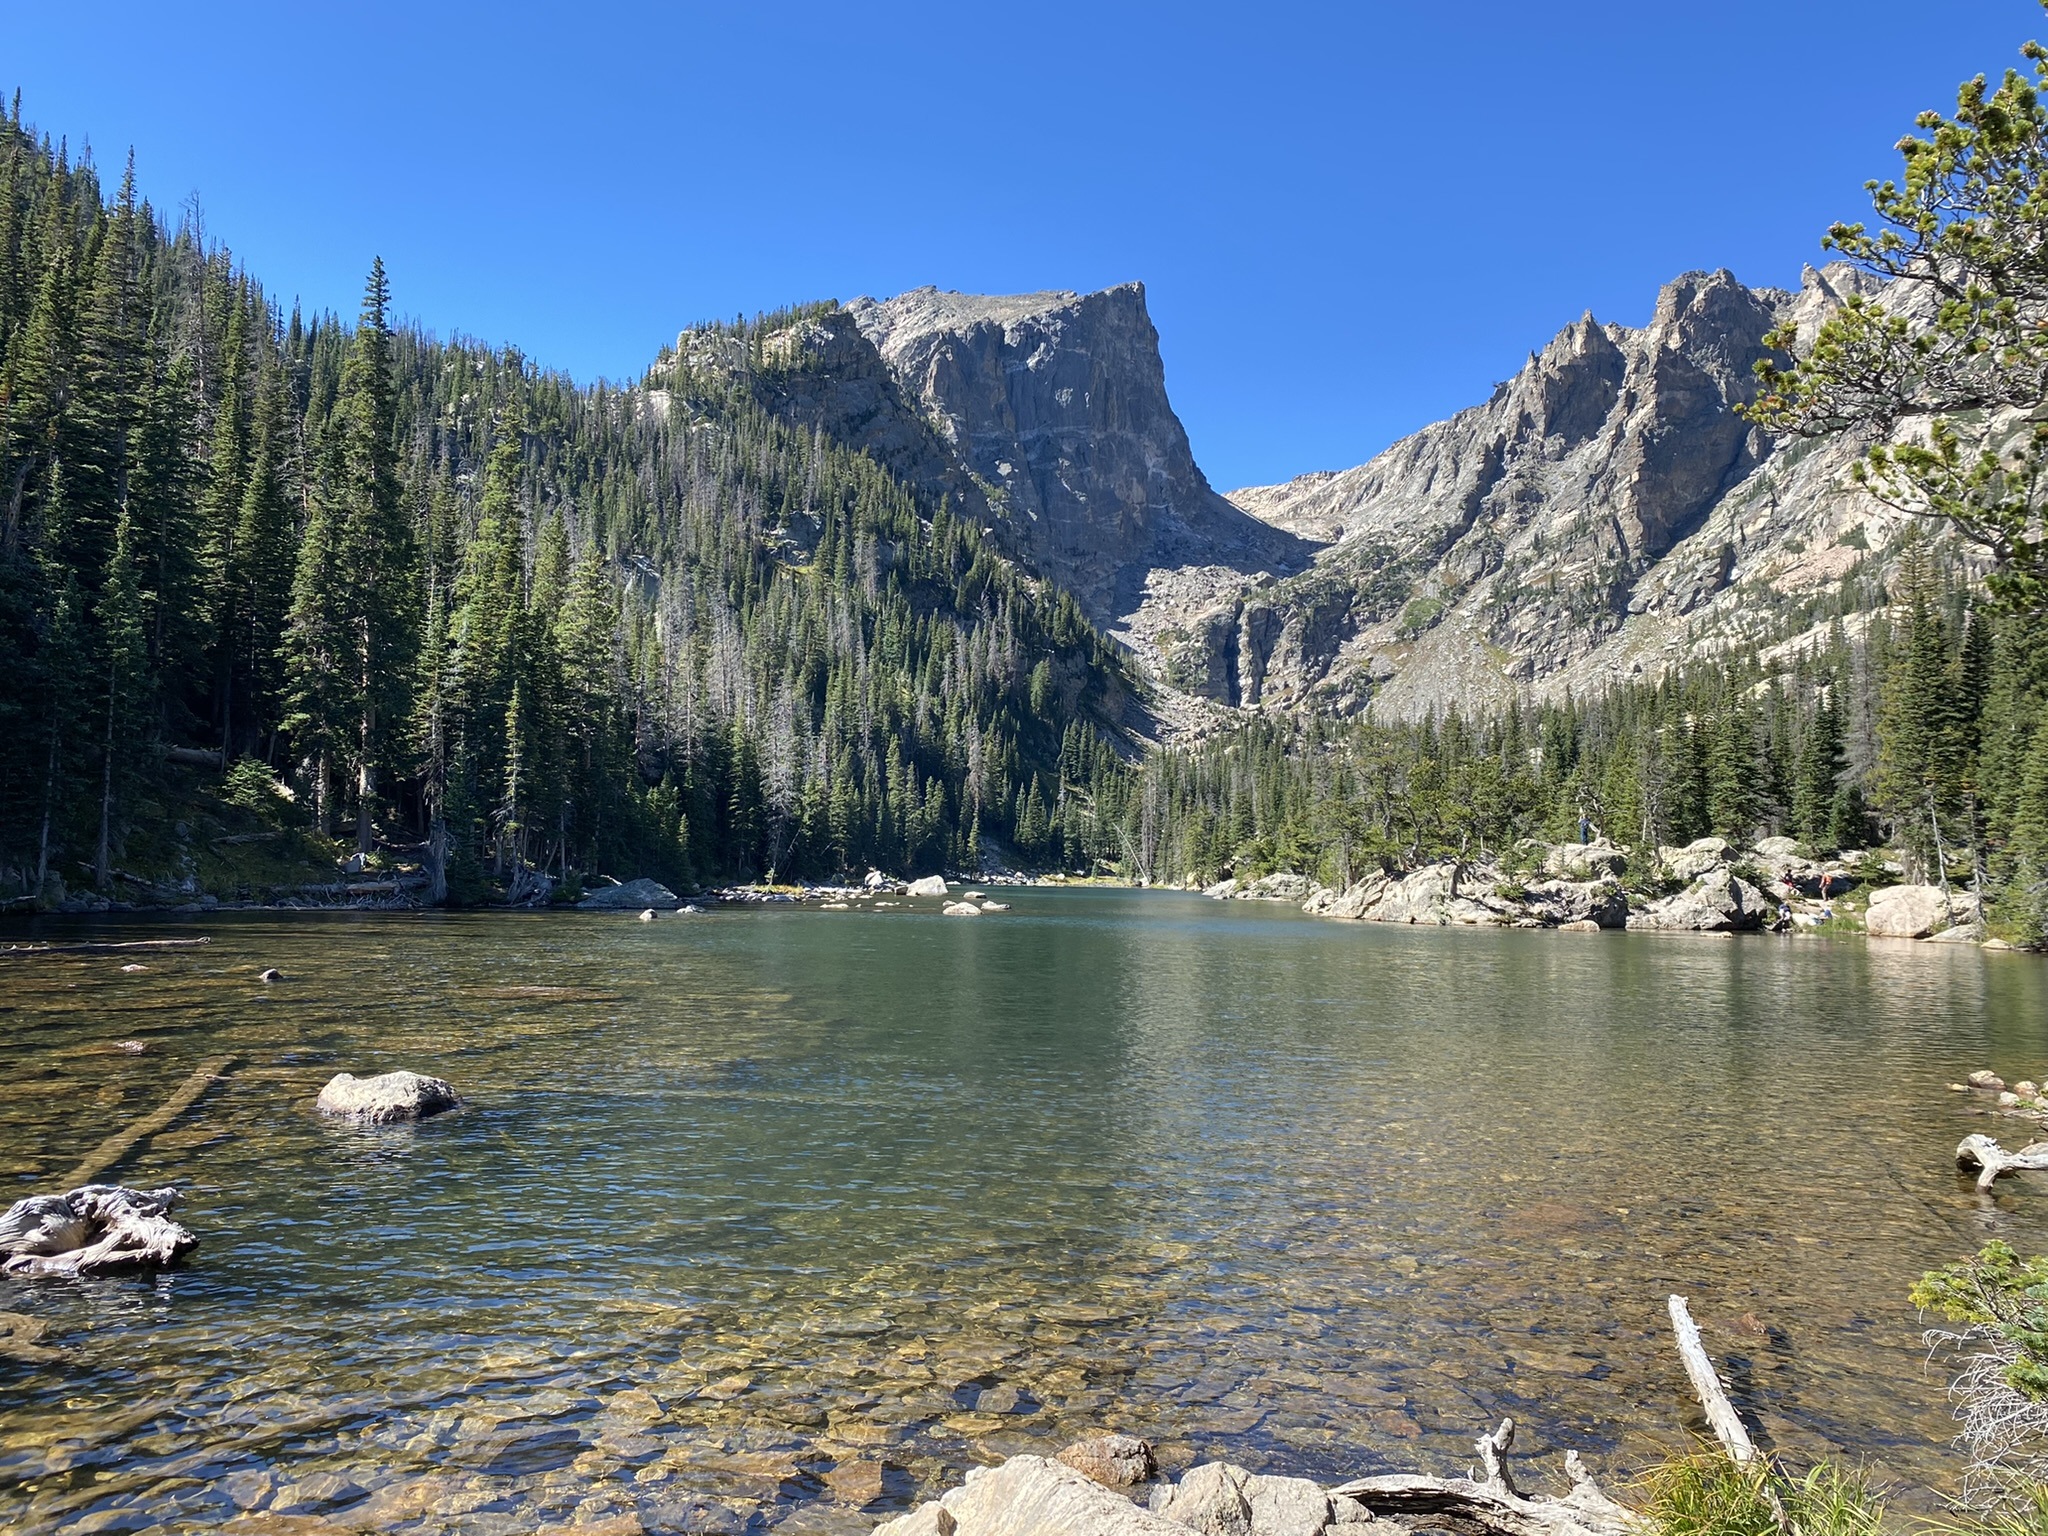
An easy hike to start the day is around Bear Lake (0.5 miles). Consider adding on a trek to Nymph Lake, Dream Lake, and Emerald Lake (a 3.6-mile round-trip hike to cover all three).
Drive or ride the shuttle to Glacier Gorge Trailhead to hike to Alberta Falls.

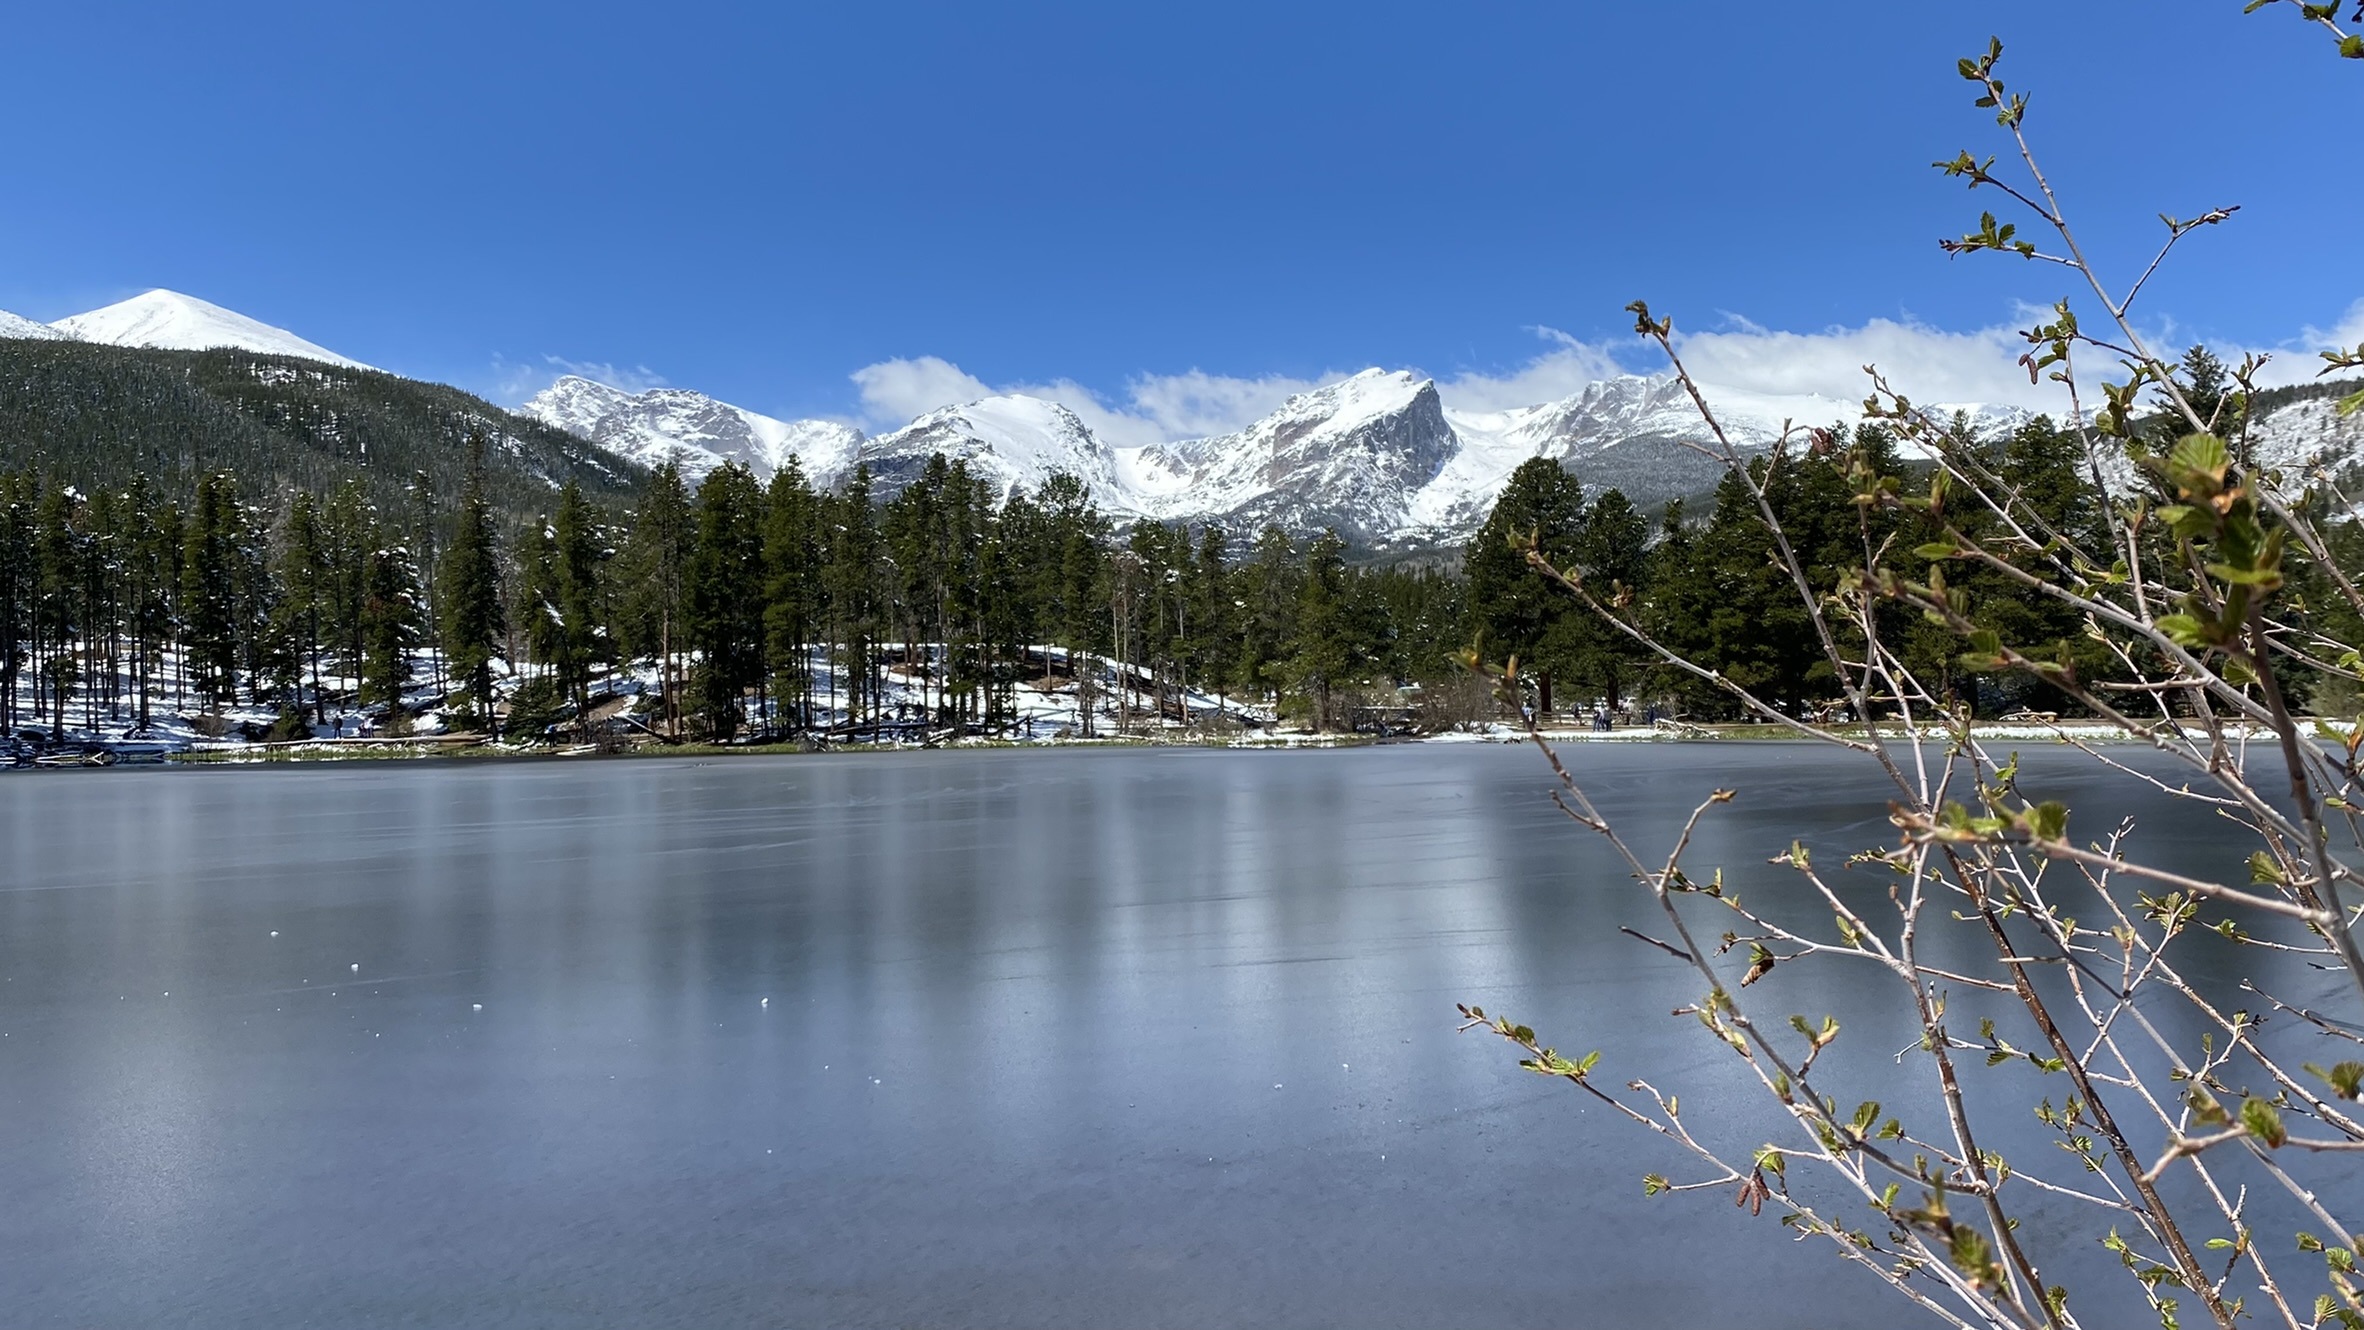
Make a pit stop at the Sprague Lake parking lot to use the facilities and complete another short, easy walk.
Load everyone back up and continue up to the Moraine Park Discovery Center. Let the kids explore the interactive natural history exhibits to learn about weather and climate, ecosystems, and glaciation.
The last area to explore for the day is Morain Park. Drive down the access road to Cub Lake Trailhead. The trails down here tend to be on the longer side. Cub Lake is a 2.3-mile hike one way. Fern Lake is a 3.8-mile trek one way. The Pool is 1.7-miles away, one way.
Day 3 – Explore Southeast RMNP – South on Hwy 7, Lily Lake, Wild Basin
Pack a lunch and some snacks, today’s itinerary includes the southeast section of the park. Join Highway 7, part of the Peak to Peak Scenic Byway from Estes Park, and meander south twelve miles through spectacular mountain and boulder scenery to Lily Lake. The parking lot is small but there is another lot across the street for Twin Sisters Trailhead.
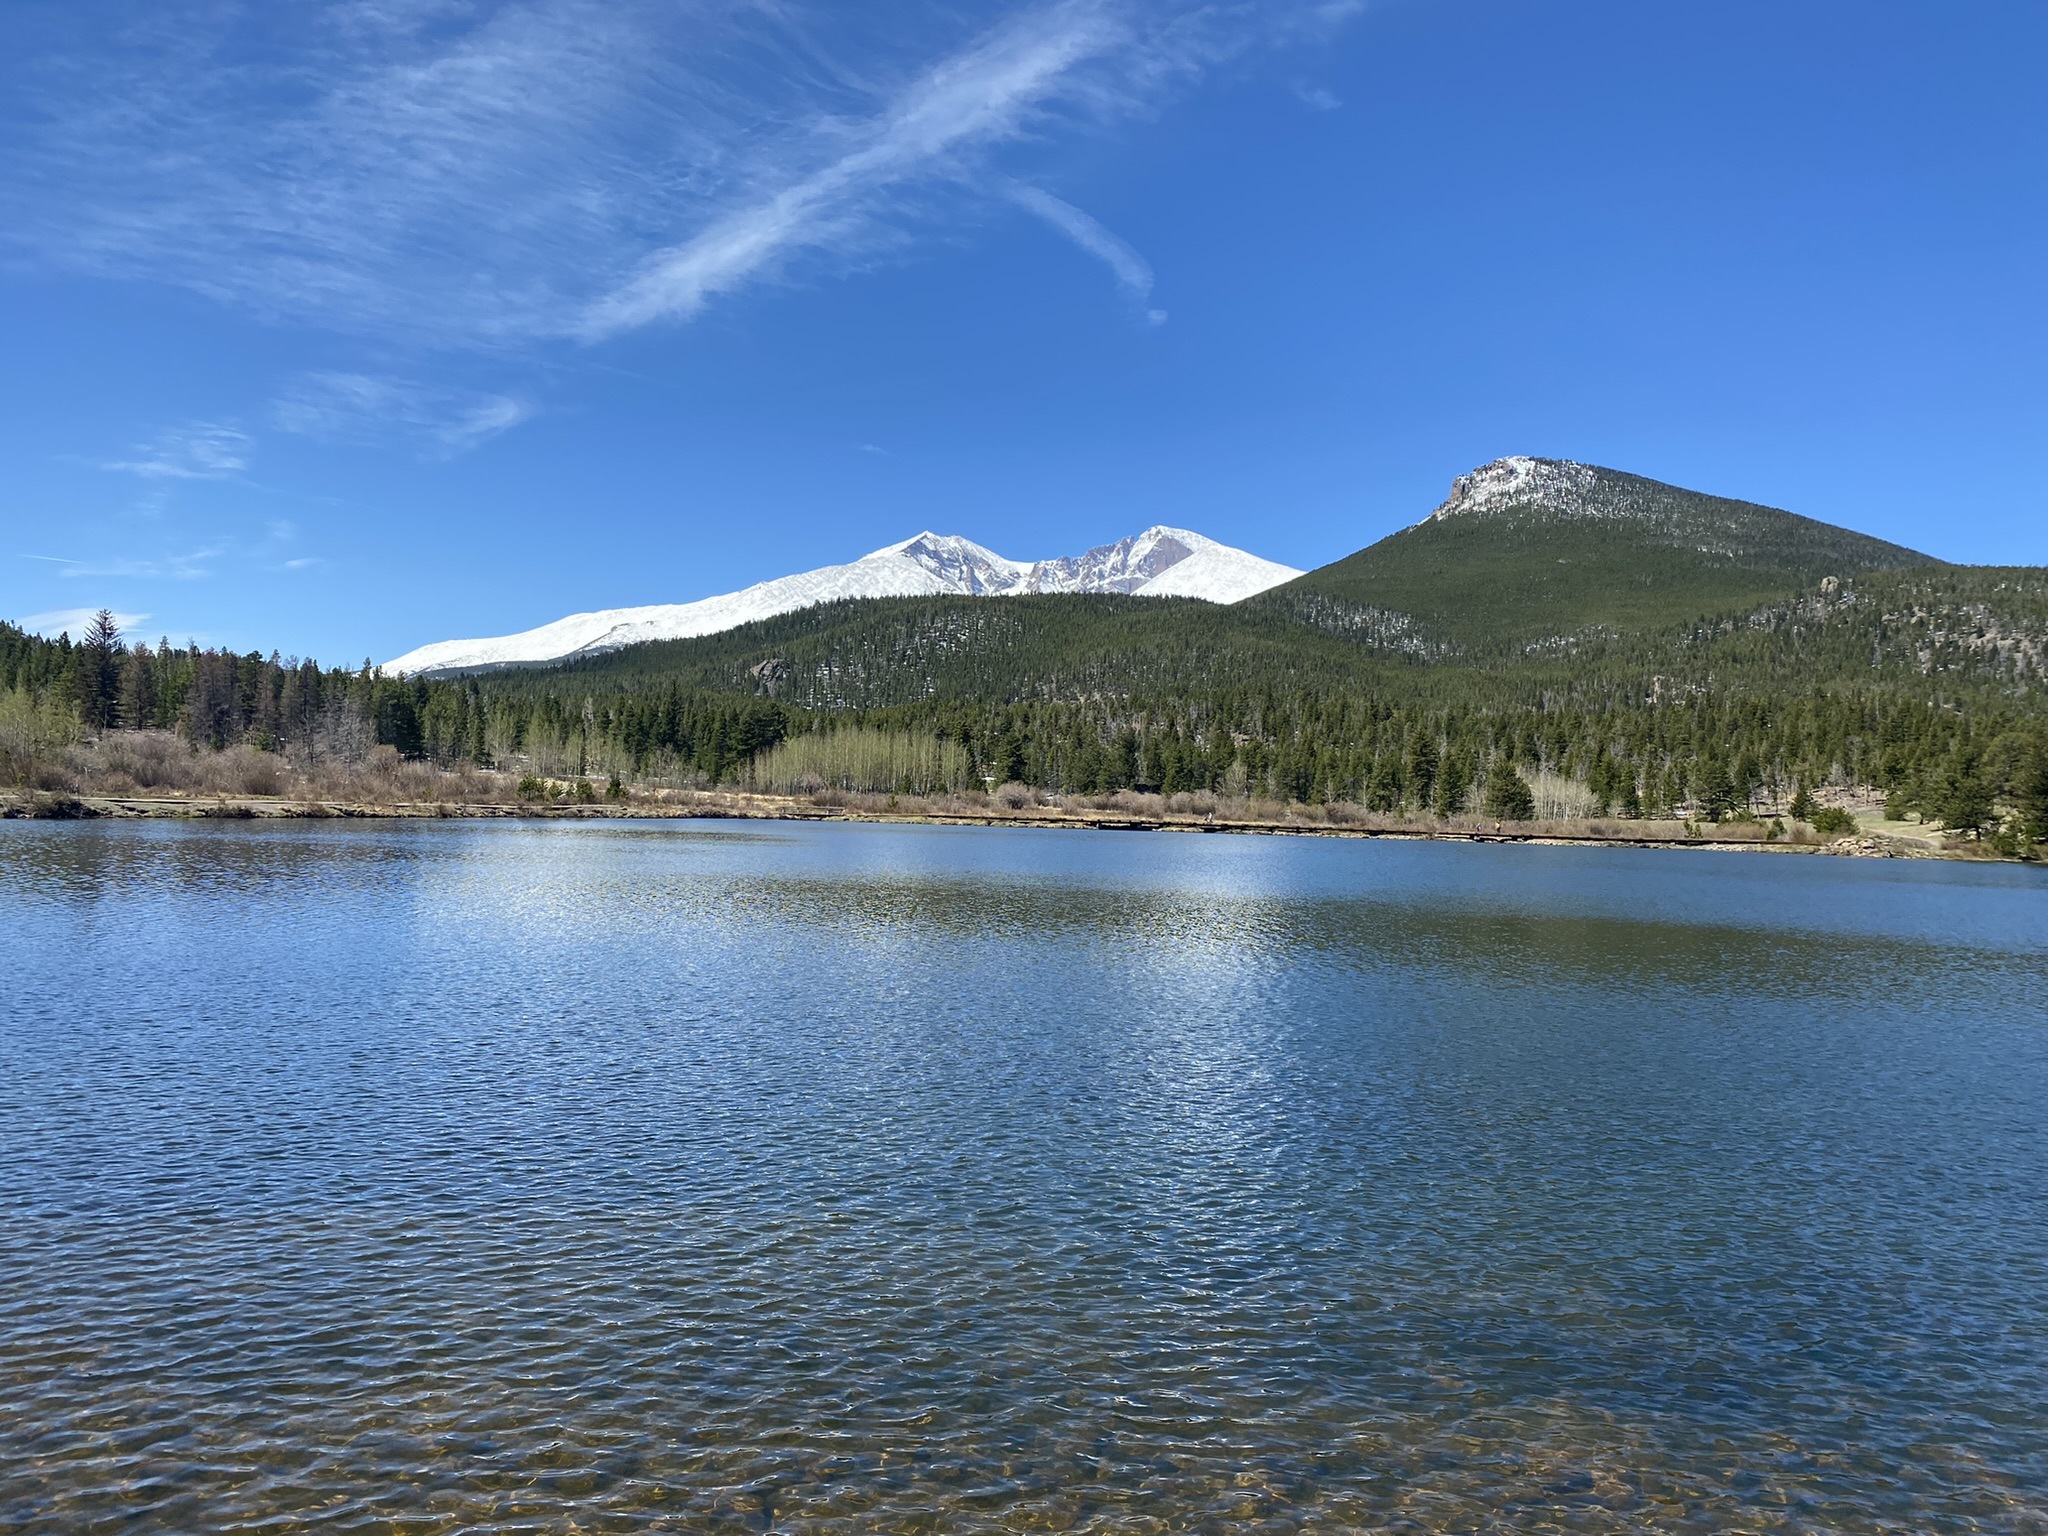
Enjoy an easy, stroller-friendly, 0.8-mile loop walk around the lake. If you’re looking for a strenuous hike, Twin Sisters Peak is a 7-mile roundtrip hike with 2500 feet elevation gain to an 11,428-foot peak.
Continue south on Highway 7 to the Longs Peak Trailhead. A short road snakes up to the trailhead at an elevation of 9,405 feet. Hikes from here range from 1.4 miles to 7.3 miles one way. We suggest Eugenia Mine hike at 1.4 miles one way. Longs Peak Keyhole Route is not a day hike but a climb only for those with mountaineering experience. The parking lot has a few picnic tables and vault toilets.
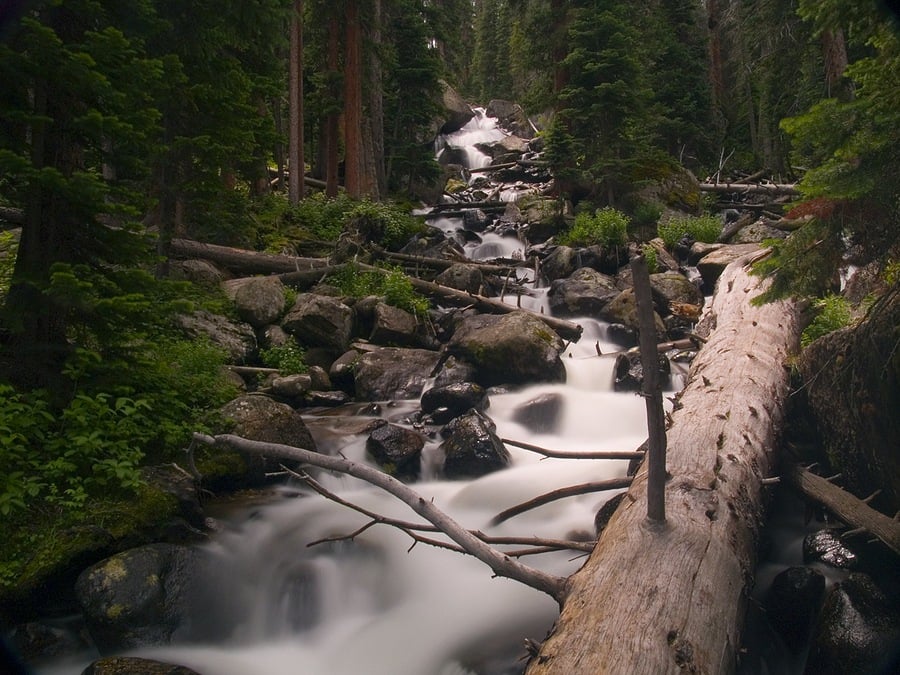
Your next stop is the Wild Basin Area. The area’s three trailheads lead to 11 hikes. Copeland Falls (0.6 miles round trip), Calypso Cascades (3.6 miles round trip), and Ouzel Falls (5.6 miles round trip) are good options.

Although not a part of Rocky Mountain National Park, Brainard Lake Recreation Area could be added to the day’s itinerary as it is 20 miles away from the Wild Basin Trailhead. The best time to visit is mid-June through mid-October. Check online for timed entry tickets before visiting.
Pack everyone up one last time to wrap up the day. Drive back to Estes Park for the night.
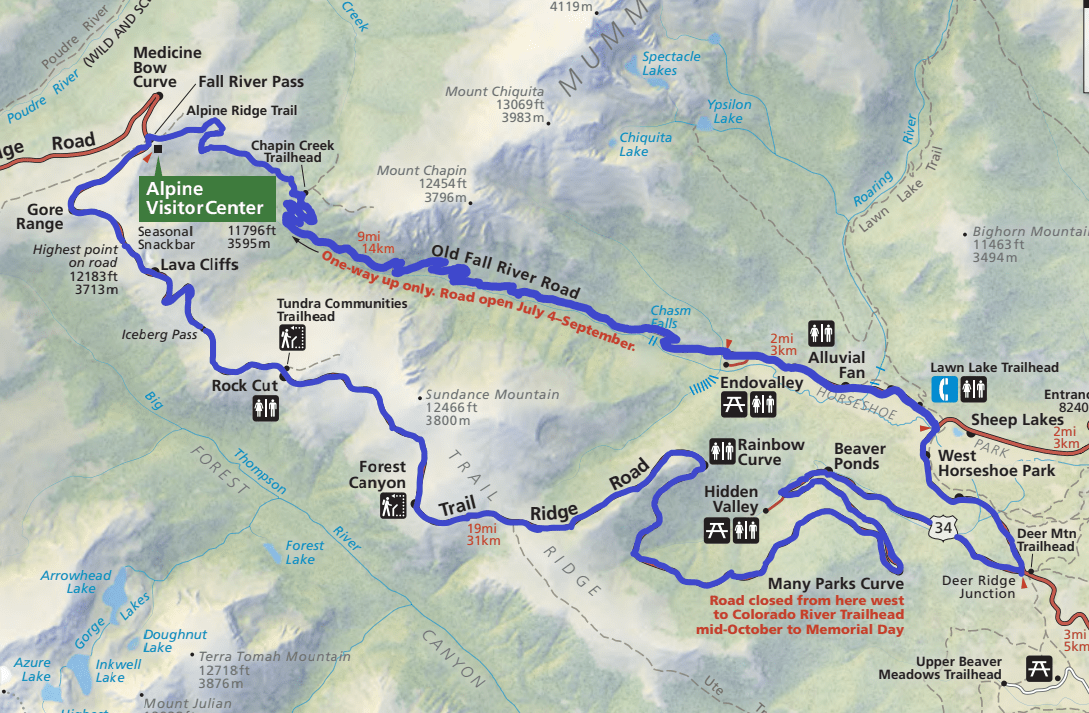
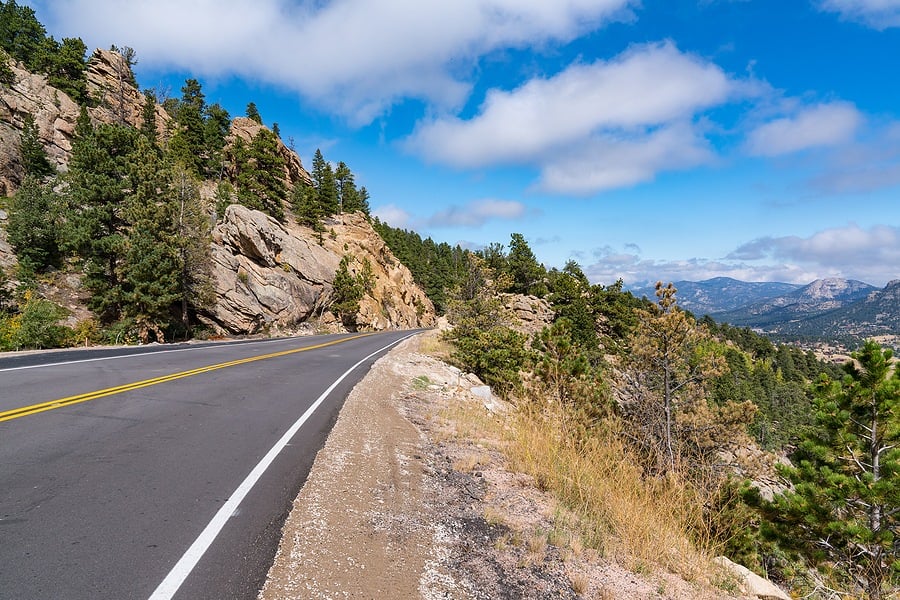
Day 4 – Old Fall River Road and Trail Ridge Road
Our fourth day’s agenda includes exploring the middle of the park by driving Old Fall River Road to the Alpine Visitor Center and returning back to Estes via Trail Ridge Road. You’ll be able to complete the loop when Old Fall River Road is open, usually July 4 – September. Check the RMNP site for road status and conditions of both roads before visiting as road closures can occur at any time. You’ll also want to check the weather forecast and be prepared for varying conditions when driving. Pack some snacks and a lunch, you’ll be exploring past the noon hour.

Starting at the Endovalley Picnic Area, Old Fall River Road is a one-way dirt and gravel road, winding 9.4 miles uphill to the Alpine Visitor Center. Built in 1920, the road was the first auto route in the park and incorporates many switchbacks to make the climb to an 11,796-foot elevation. Slow down, the speed limit is 15 miles per hour, and enjoy the at times scary views – the steep, narrow road doesn’t have any guard rails. Don’t worry though, the road is well maintained – although there are many potholes- and doesn’t require a 4WD vehicle.
Check out the stops at Chasm Falls and Chapin Creek Trailhead. Continue on to Alpine Visitor Center.
Explore the visitor center, get a bite to eat, and trek the 0.7-mile round-trip Alpine Ridge Trail. Take your time! The high elevation will be felt during your walk up but the fantastic 360-degree views are worth it! Don’t forget to put on a jacket or additional layers as it can be cold and windy at the top.
The visitor center is your halfway point of the loop. Head back to Estes Park on Trail Ridge Road.
Cresting at 12,183 feet, Trail Ridge Road is another fantastic roadway with spectacular views but it also has the reputation of being a scary drive. Again, no guard rails line the road. Take your time driving back and drive the speed limit, remember not to hog the middle line as many tend to do driving towards Estes. Worried about driving it? Check out this Youtube video of the entire drive from Estes Park to Grand Lake to give you a preview of the road (although in this case, reversed).
Make stops at Gore Range, the highest point on the road (12,183 feet elevation), Lava Cliffs, and Rock Cut. Stretch your legs with a 1.1-mile walk at Tundra Communities Trailhead. Enjoy the views at Forest Canyon, Many Parks Curve, Hidden Valley, and Beaver Ponds.
Depending on the time, you can head back to Estes Park or revisit some of your park favorites so far.

Day 5 – West Rocky Mountain National Park
Start off early, the day’s expedition explores the remaining west side from Alpine Visitor Center to Grand Lake. Once again, head west on Trail Ridge Road. If you want more time in Grand Lake, we suggest not stopping until you reach the Alpine Visitor Center.
Time to drive the 48 miles of Trail Ridge Road to Grand Lake can be anywhere between 2 and 4 hours depending on the number of visitors, wildlife on the road, your stops, and the weather.
The first stop after the visitor center is Medicine Bow Curve where you can see the Medicine Bow Mountains and Wyoming (35 miles away) on the horizon.

Advance westward to the next point of interest, Milner Pass. At 10,759 feet the pass is located on the continental divide. Here when it rains, on the east side it will flow towards the Atlantic Ocean while the rain on the west side will flow towards the Pacific Ocean. Views include Poudre Lake which completely freezes in the winter making it a dead lake because no fish can survive.
Lake Irene offers a picnic area and a short walk to the lake. A loop around the lake is only 0.5 miles.

Move on to Farview Curve with vistas of Kawnueeche Valley and the Never Summer Range. This row of mountains is the only volcanic mountain range in the park.
A series of five switchbacks leads to the Colorado River Trailhead offering a couple of hiking options including a 0.5-mile hike that leads you to the Colorado River. Timber Lake Trailhead starts a 4.8-mile one-way hike to Timber Lake.
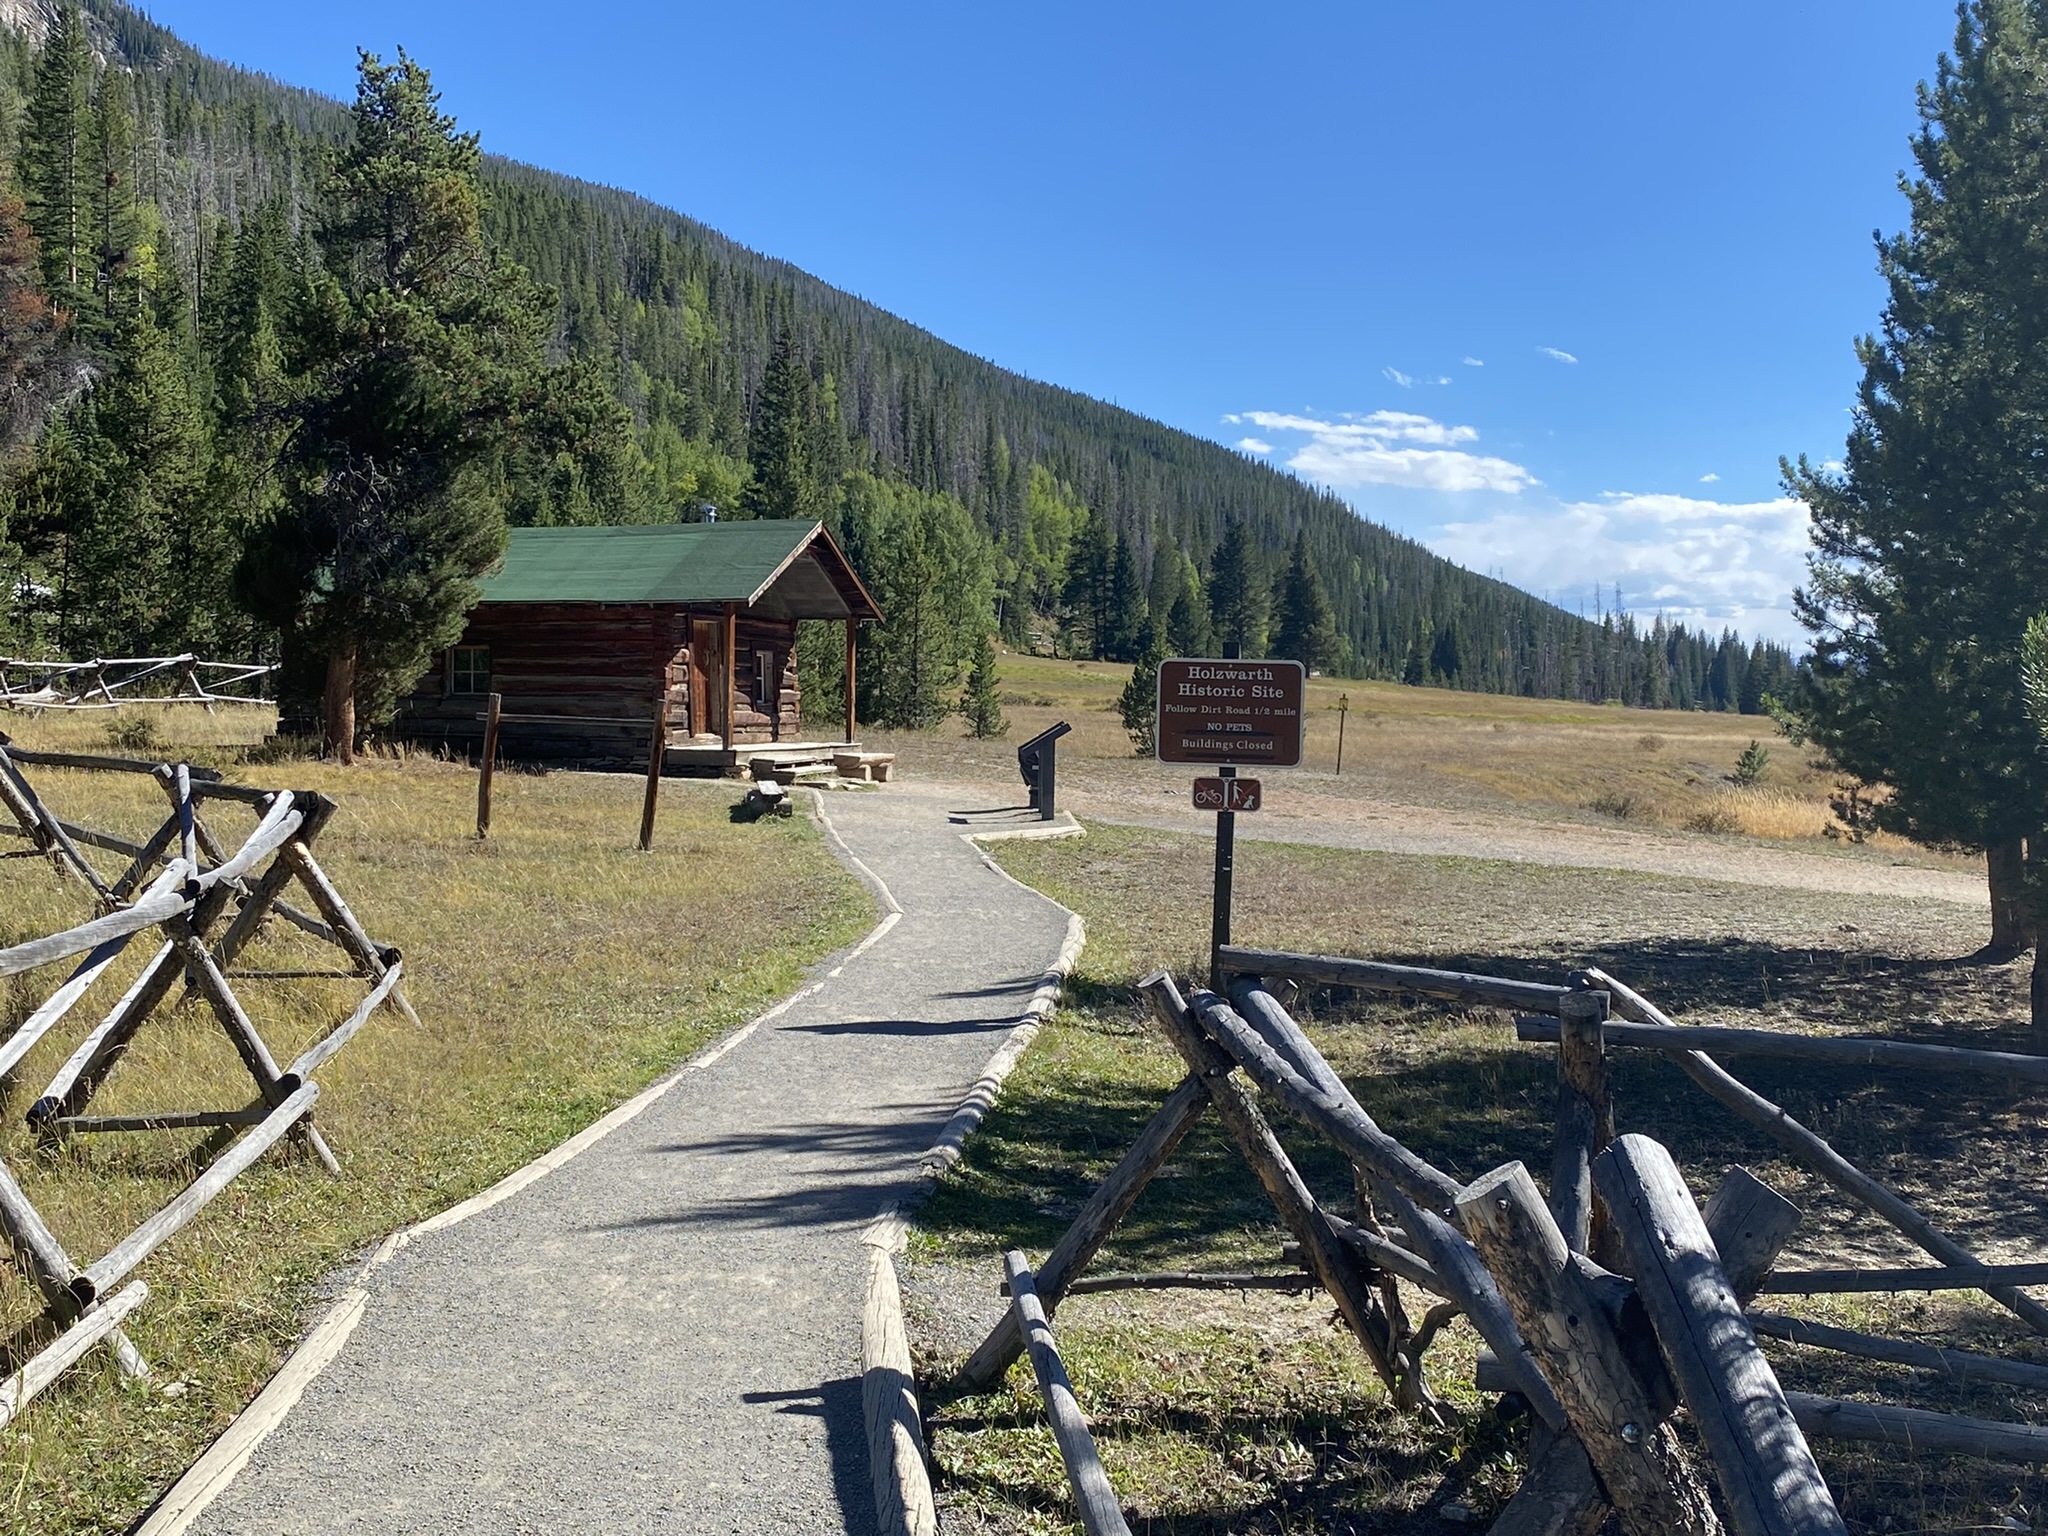
Explore the Holzwarth Historic Site and learn about the family’s homestead and “dude ranch” through hands-on activities.
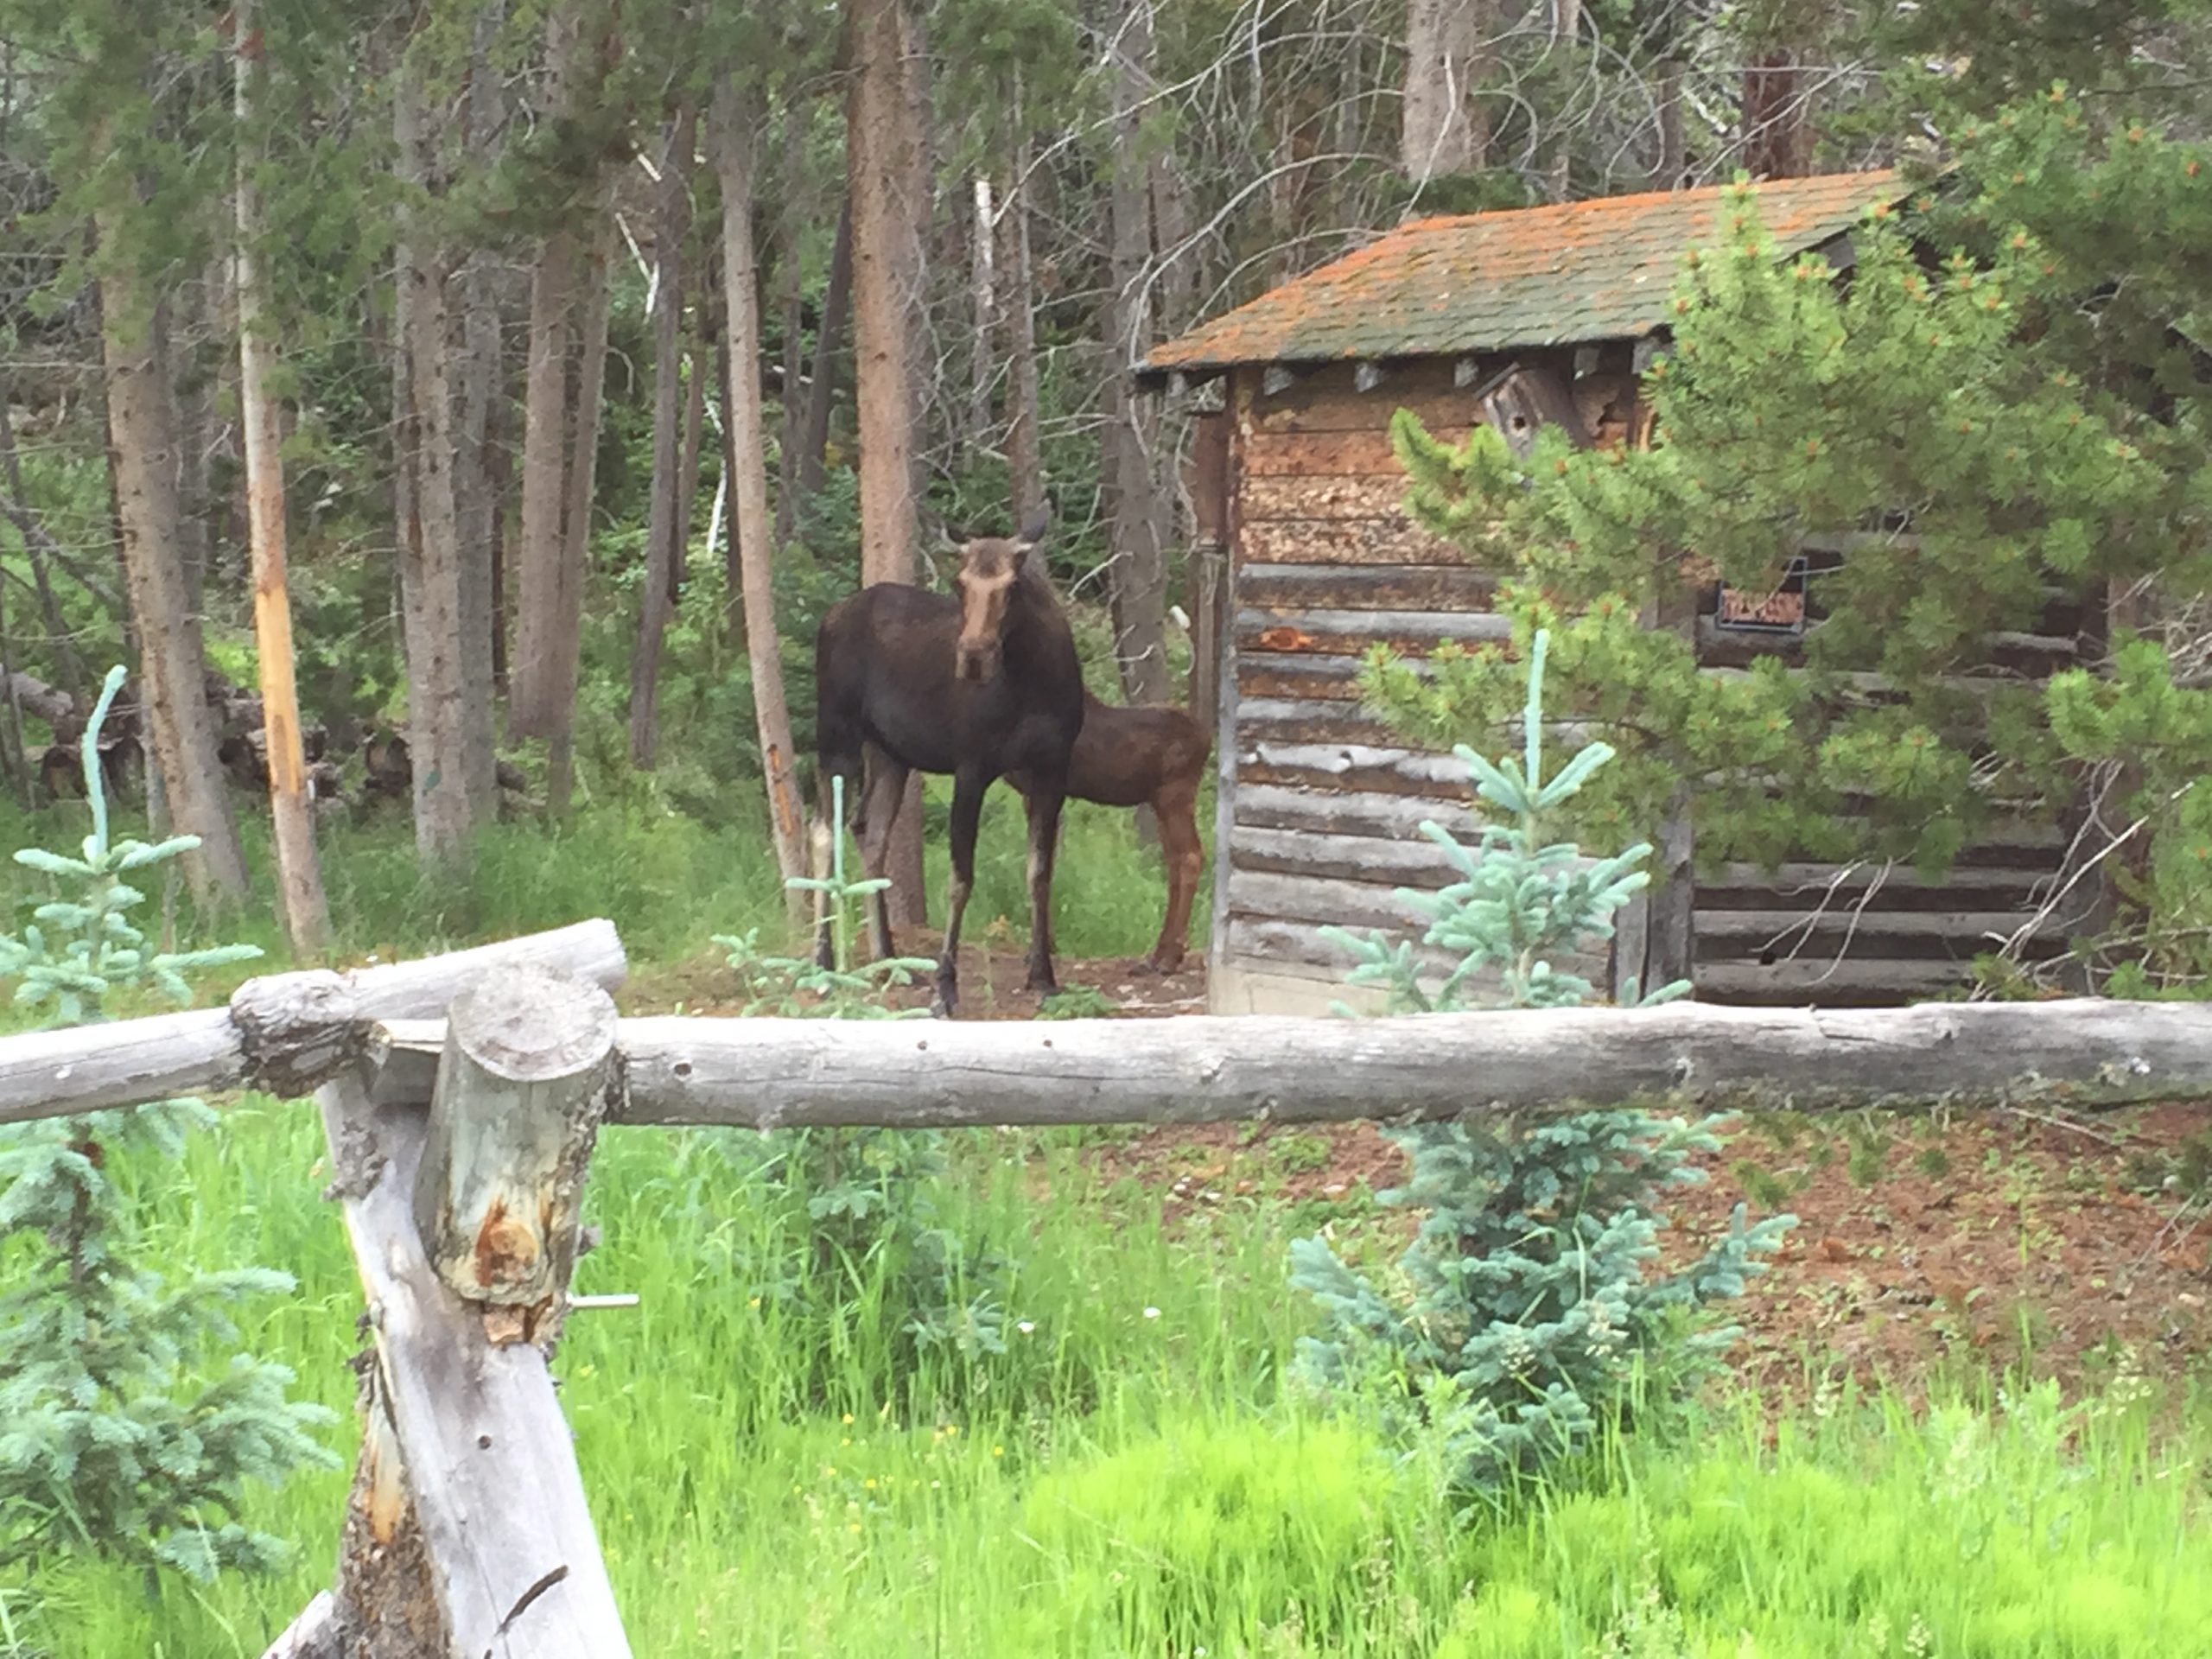
Your next four turn-offs provide more opportunities to hike – Bown/Baker Trailhead and Coyote Valley Trailhead, Onahu Trailhead, and Green Mountain Trailhead (currently closed due to wildfire damage). Coyote offers a short, easy 1-mile hike through Kawuneeche Valley. Elk and moose are often seen during the early morning and early evening hours.
At Harbison Meadows, named after the sisters who homesteaded the area and ran a dairy ranch, you’ll find a pavilion with picnic tables to enjoy the view.

Check out Kawuneeche Visitor Center past the Grand Lake Entrance Station. Although through the gate, you still have 3 more trailheads around Grand Lake to explore, Tonahutu/North Inlet. East Inlet, and East Shore. East Inlet Trailhead offers a 0.6 round trip walk to Adams Falls.

Spend the rest of the day exploring Grand Lake, Shadow Mountain Lake, Arapaho National Recreation Area, and Lake Granby. If you plan to return to Denver, the drive is around 2 hours.
2, 3, 4-Day Rocky Mountain National Park Itineraries
Depending on your children’s ages, your family’s desire to hike, time of year, number of visitors in the park, and the timed entry pass you booked, several itineraries can be made from our five-day suggestion above. You may be able to combine a few days to shorten your trip.
- 4-Day Itinerary – shorten the five days itinerary above by combining days two and three by scheduling short hikes. This itinerary covers everything at a quicker pace.
- 3-Day Itinerary – only visit the east side of the park. Follow days one and four above and combine days 2 and 3 for the third day, This itinerary removes the drive to Grand Lake and time exploring that town.
- 2-Day Itineraries
- Visit the east side on a faster schedule by eliminating days 4 and 5 from the above 5-day itinerary and combining days 2 and 3.
- Cover the Upper Loop and Old Fall River Road/Trail Ridge Road Loop by covering days one and four. This is good for staying in Estes Park.
- If you have two days and want to start in Estes Park and end up in Grand Lake or vice versa, complete days 1 and 5.
Spring and Fall Rocky Mountain National Park Itineraries
During the spring and fall, Trail Ridge Road and Old Fall River Roads are closed meaning you need an alternate route to get from Estes Park to Grand Lake. If you still want to visit both sides during this time we recommend your itinerary follow days 1-3. If the weather is good for mountain travel, you can meander through the mountain highways of 7, 72, and 119 to Interstate 70 This route is also known as the Peak to Peak Scenic Byway with many fun towns to stop in and things to see. Highway 40 from Interstate 70 to Grand Lake includes the towns of Winter Park, Fraser, and Grandby.
Where to Eat
The only food available in the park is at Cafe at Trail Ridge, open when Trail Ridge Road is open. We suggest packing snacks and lunches during your visit. Estes Park has a nice Safeway to load up or replenish your stock. Grand Lake also offers a couple of grocery options.
Both towns offer many restaurant choices. For dinner, we enjoyed Smokin’ Dave’s BBQ & Brew in Estes Park during our visit.
Where to Stay for Big Families Near RMNP
National Park Lodging
Rocky Mountain National Park does not have overnight lodging. Accommodations will have to be booked outside the park.
Camping and RV
The park has four reservable campgrounds and one first-come, first-served campground for tents, RVs, and groups. Also available are 200+ wilderness campsites that require permits.
Vacation Rentals
If you want the full mountain experience, need more room, or are staying for more than a couple of days; a vacation rental is a great choice for your visit. Rentals are available on both sides of Rocky Mountain National Park.
Local Hotels, Lodges, and Inns
In this area, there are a lot more vacation rentals than big family-friendly hotels. Check out our hotel listings for big families in Estes Park and Grand Lake.

25 Tips for Visiting Rocky Mountain National Park with Kids
- Be aware of park closures – road, park follow on Twitter or check their app before visiting each morning
- Be aware of wildlife. It’s their park. Keep your distance, 120 feet or three bus lengths away.
- Be aware of altitude sickness and motion sickness. Know the symptoms of each.
- Estes Park and Grand Lake have grocery stores – load up on items for dinner, lunch, and snacks.
- Pack sunblock and bug spray.
- Keep hydrated. Pack plenty of water for your crew. The high elevation means you’ll need more fluids than normal.
- If you plan on hiking more moderate to strenuous trails, give yourself a day or two to acclimate to the higher elevation before scheduling this level of hiking.
- Pack a small litter sack when you hike to take out what you brought in with you so you Leave No Trace.
- Take every turnout and side road to explore the park.
- Early starts are best as many parking lots fill early. Be flexible in your day as you move through the park.
- Know your travel style and limits. If your family isn’t big into hiking, that’s okay. Enjoy a light hike and all the wonderful views of the park from the road pullouts.
- Carry a map and wear good hiking shoes. Print out the detailed trail maps before you go.
- Fuel up before entering the park, there aren’t any gas stations in the park.
- When people are stopped, they probably see wildlife. Pull over to check it out. Bring your binoculars.
- Long lines for restrooms along Trail Ridge Road are common – have extra layers to wear while waiting or stop at the visitor centers before driving the road.
- With all national parks, pack bathroom tissue. Parks are big and sometimes vault toilets and restrooms run out of tissue
- Swimming is not recommended as the high altitude keeps streams and lakes too cold for swimming.
- Become a Junior Ranger – ask at visitor centers about activity booklets by age; five and under, six to eight, and nine and up. Finish the activities and be rewarded with a Junior Ranger badge.
- Be weather-wise. Weather can change quickly in the park. Snow is possible any time of year and thunderstorms roll in quickly. Pack layers to wear.
- Sledding and tubing gear are available for rent in Estes Park for use at Hidden Valley.
- Download the NPS app for additional information.
- Follow RMNP on Twitter for updates on road conditions and park notifications.
- Pack your patience. Roads will be busy during peak season.
- Don’t rely on cell coverage. You probably won’t be able to receive any work calls. Such a shame.
- Enjoy your visit! Don’t rush through the roads, drive the speed limit, and enjoy the views!
Pin now for later!
